Fig. 14 shows the system architecture of MR3 from the aspect of system implementation. MR3 is implemented in Java language, using the Java Swing user interface. MR3 uses JGraph for RDF(S) graph visualization, and Apache Jena for enabling the use of Semantic Web standards such as RDF, RDFS, and OWL. The Parser and Generator in MR3 are implemented using Jena APIs. By using these libraries, MR3 is implemented as an environment for graphical representation of Semantic Web descriptions.
Fig. 15 shows the system overview of MR3 . MR3 consists of the Parser, Generator, RDF(S) Management, and Graphical Modeler. The Graphical Modeler mainly consists of the Instance Editor, Class Editor, and Property Editor. The user edits the RDFs description visually via the Graphical Modeler. The input and output of MR3 are RDFs documents. The Parser analyzes input RDFs documents and makes further operations possible by transforming the RDFs document into a Jena model. Then, the Parser changes the Jena model into an internal data expression, and RDF(S) management is performed. The Generator changes the internal data expression into a Jena model. Finally, the Jena model is changed into an RDFs document.
The Instance Editor allows the user to express the relationship between an RDF resource, RDF property, and RDF literal using a directed graph, and also allows the attributes of each element to be edited. The attributes of an RDF resource consist of a URI, the URI type, and the RDF resource type. The RDF resource type can be chosen using the Class Editor. The URI type can be chosen from either a URI or can be set as anonymous.
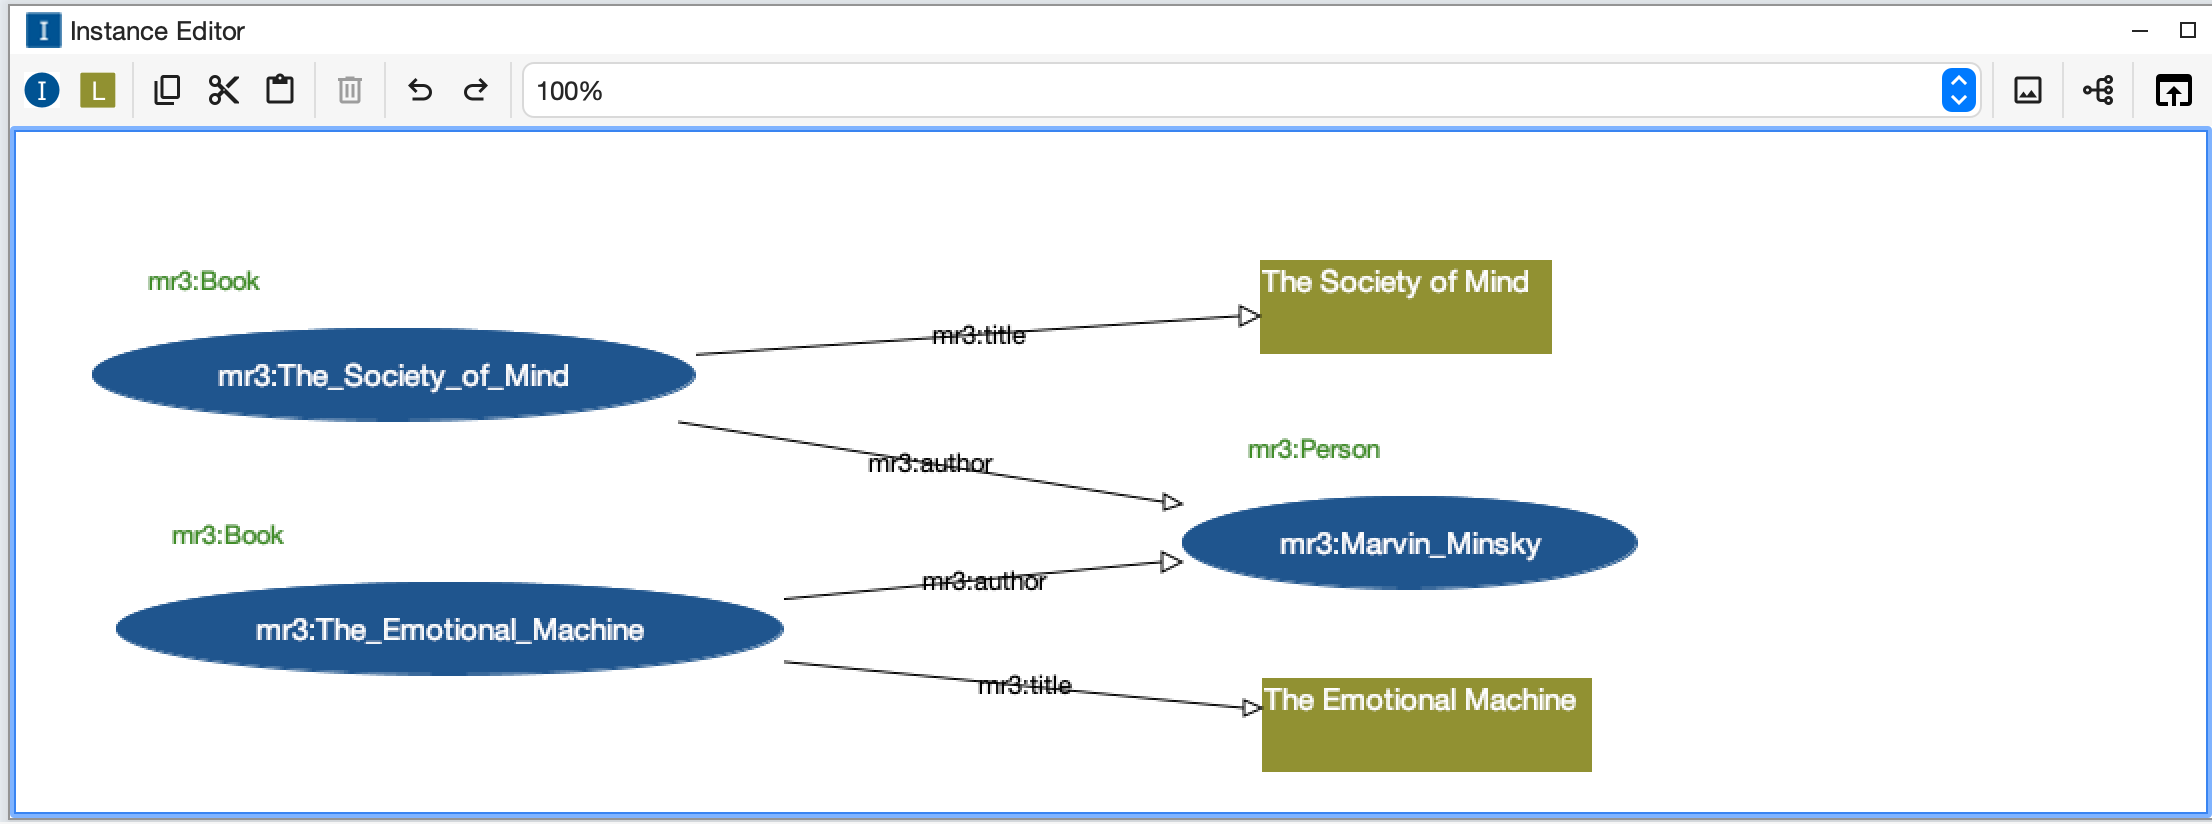
As shown in Fig. 17, RDF resources are represented as ellipses, RDF properties are represented as arrows, and RDF literals are represented as rectangles in the Instance editor. Types of RDF resources are shown at the upper left part of the RDF resources.
When users right click in the Instance Editor, a popup menu is shown. The contents of the popu menu is different when nodes are selected or not. Popup menus are shown as follows.
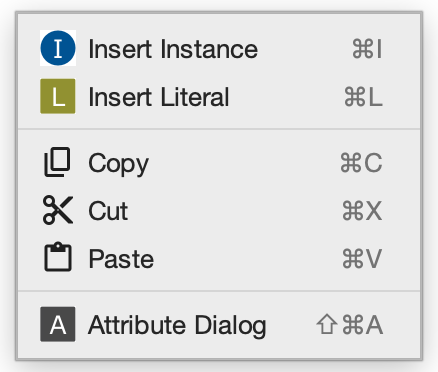
Fig. 18 Popup menu when nodes in the Instance Editor are not selected.
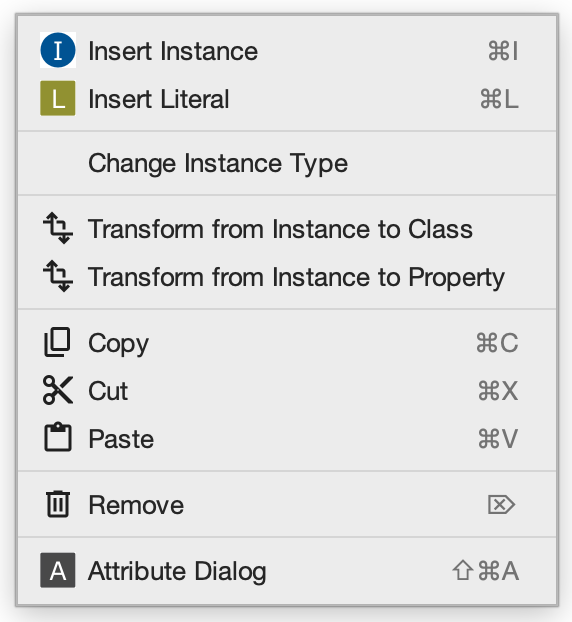
Fig. 19 Popup menu when nodes in the Instance Editor are selected.
Insert Instance
Insert an RDF resource to the position that mouse is right clicked.
Insert Literal
Insert an RDF literal to the position that mouse is right clicked.
Change Instance Type
Convert an RDF resource type to a class selected in the Class Editor.
Transform from RDF to Class
Transform the selected RDF resource to an RDFS class.
Transform from RDF to Property
Transform the selected RDF resource to an RDFS property.
Copy
Copy selected RDF resources, properties, or literals
Cut
Cut selected RDF resources, properties, or literals
Paste
Paste selected RDF resources, properties, or literals
Remove
Remove selected RDF resources, properties or literals
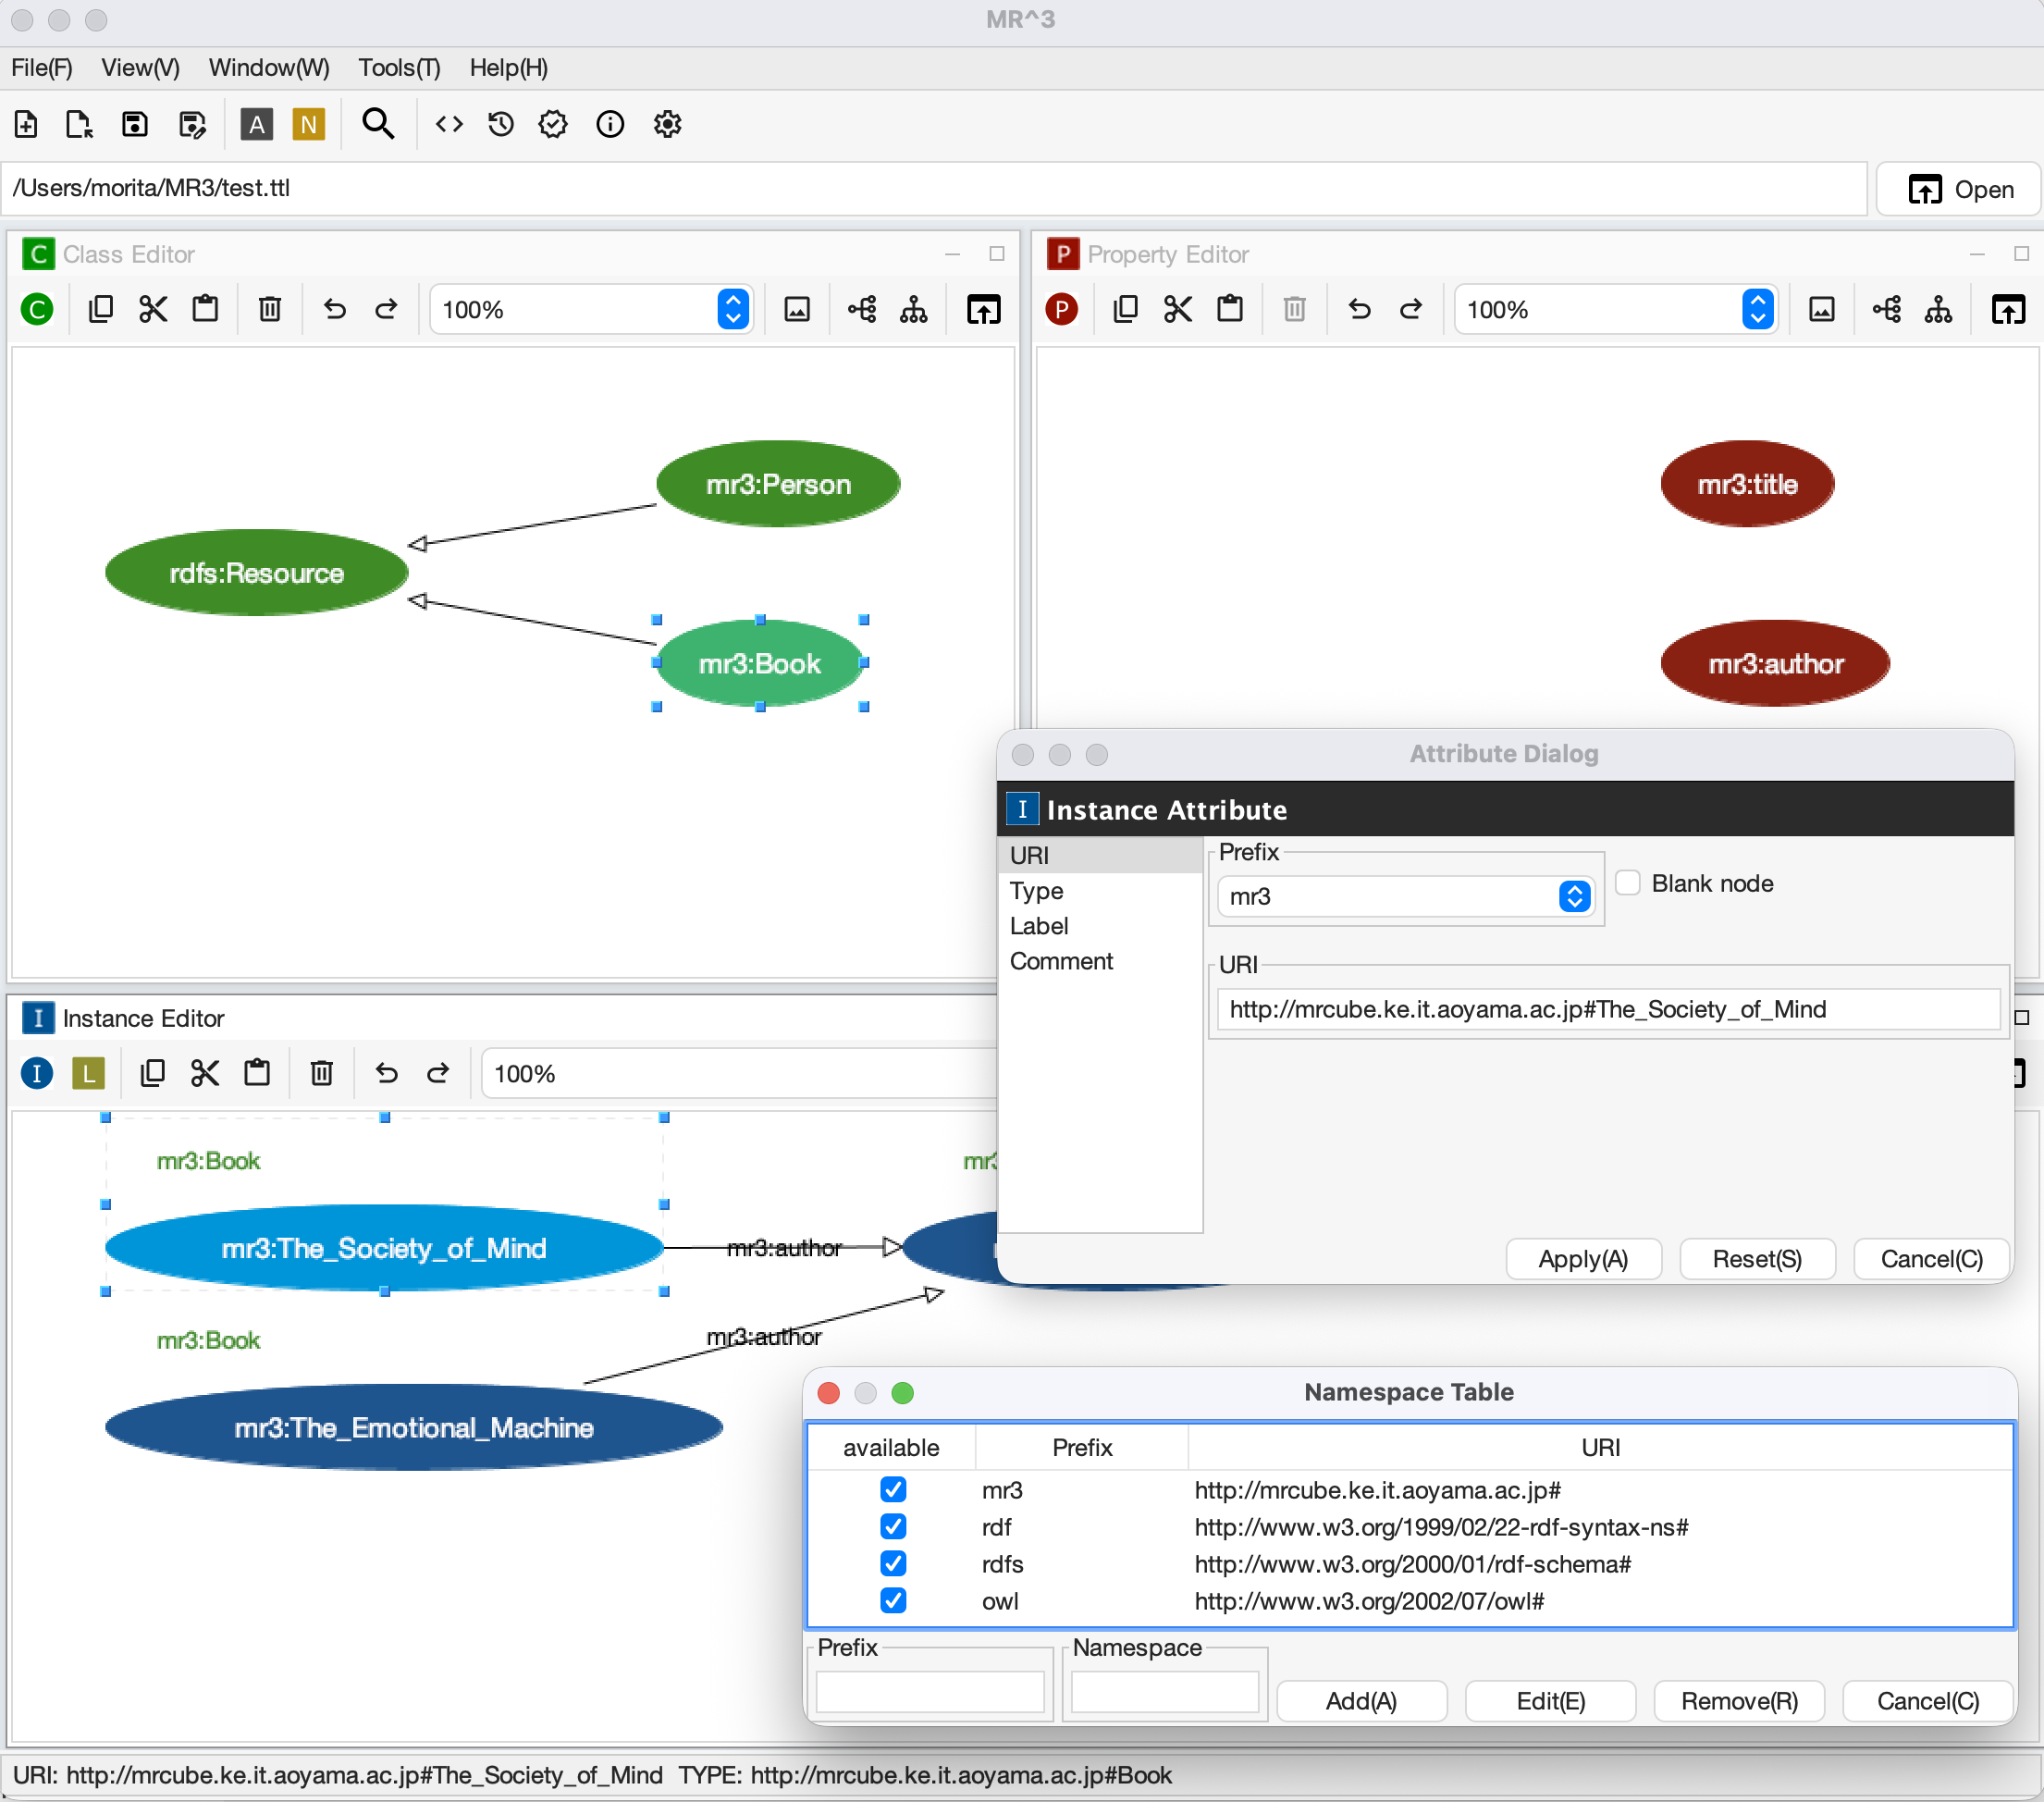
When users select an RDF resource in the Instance Editor, the attributes of the RDF resource are shown in the Attribute Dialog ( Fig. 20 to Fig. 25 ). The attributes of RDF resources are URI, rdf:type, blank node or not, rdfs:label, and rdfs:comment. Here the blank nodes are RDF resources that are not named by URIs. Blank nodes can not be acceced from external documents. However, the blank nodes can be subjects or objects of statements. They are used to represent RDF resources that are difficult to name or structure RDF contents.
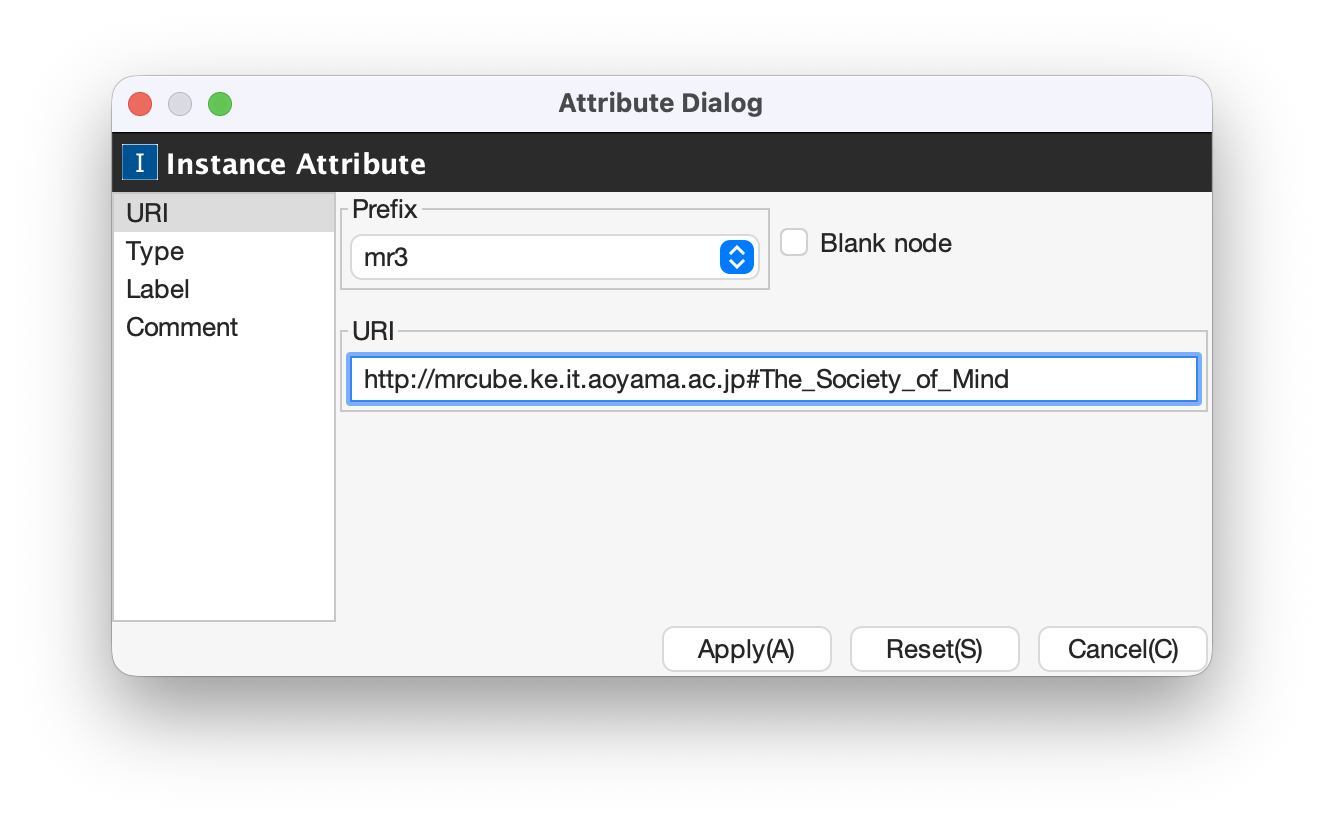
If users would like to set a URI of an RDF resource, they should select URI from the left side menus in the Attribute Dialog as shown in Fig. 20. Prefixes that are registered in the Namespace Table are shown in the [Prefix] combo box. When users select one of the prefixes in the combo box, the corresponding namespace is shown in the [RDF Resource] text field. The users can input any URI in the text field. If the users would like to set an RDF resource as a blank node, the users should check the [blank node] checkbox.
Fig. 20 Attribute Dialog (URI of an RDF resource)
If the users would like to set a type to an RDF resource, the users should select the [Resource Type] from the left side menu in the Attribute Dialog as shown in Fig. 21. The [Resource Type] checkbox should be checked when the users input the type of an RDF resource. If the users would like to empty the type of an RDF resource, they should uncheck the [Resouce Type] checkbox.
When the users click the [Select Type] button, [Select Resource Type Dialog] are shown as shown in Fig. 22. The class hierarchy that is build in the Class Editor is shown in the [Select Resource Type Dialog]. When the users select an RDFS class in the dialog, the namespace and ID of the selected class are set in the Attribute Dialog.
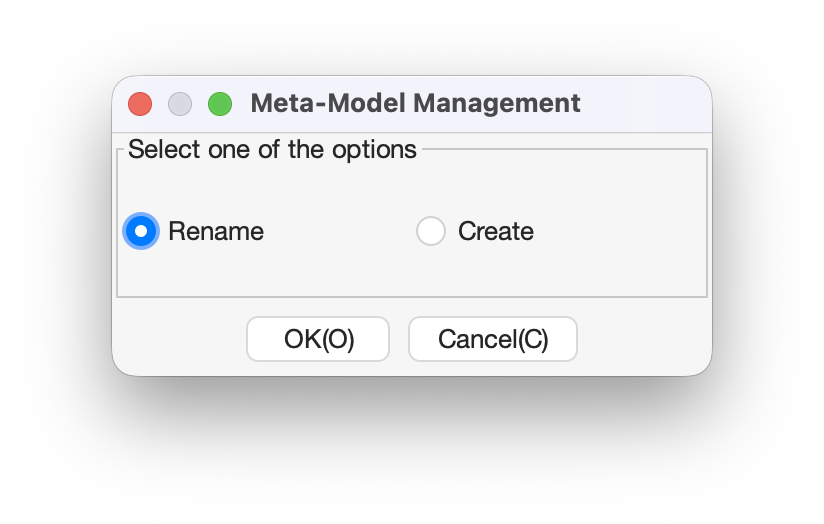
When the users input a URI that is not defined in the [Class Editor], [RDF(S) contents management] dialog is shown as shown in Fig. 23. In the RDF(S) contents management dialog, the users can select Rename or Create.
When the users click the [Class Edit] button, the type of an RDF resource is selected and the attributes of the type of the RDF resource are shown in the Attribute Dialog.
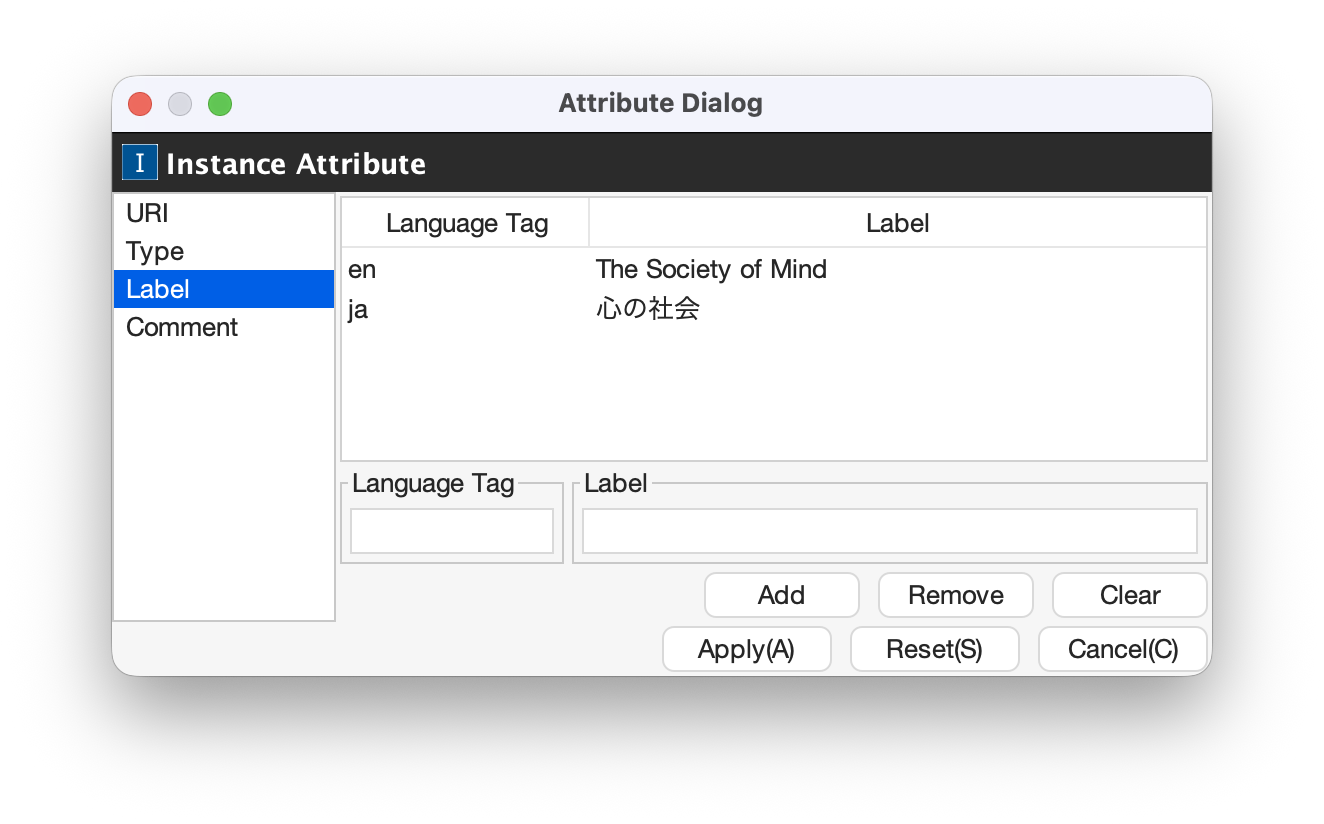
If the users would like to define the rdfs:label of an RDF resource, the users should select [Label] in the left side menu in the Attribute Dialog as shown in Fig. 24. After inputting language in the [Lang] text field and label in the [Label] text field, the language and the label are added in the table in the Attribute Dialog. If the users select a line in the table and click Remove button, the selected label is removed.
Fig. 24 Attribute Dialog (Label of an RDF resource)
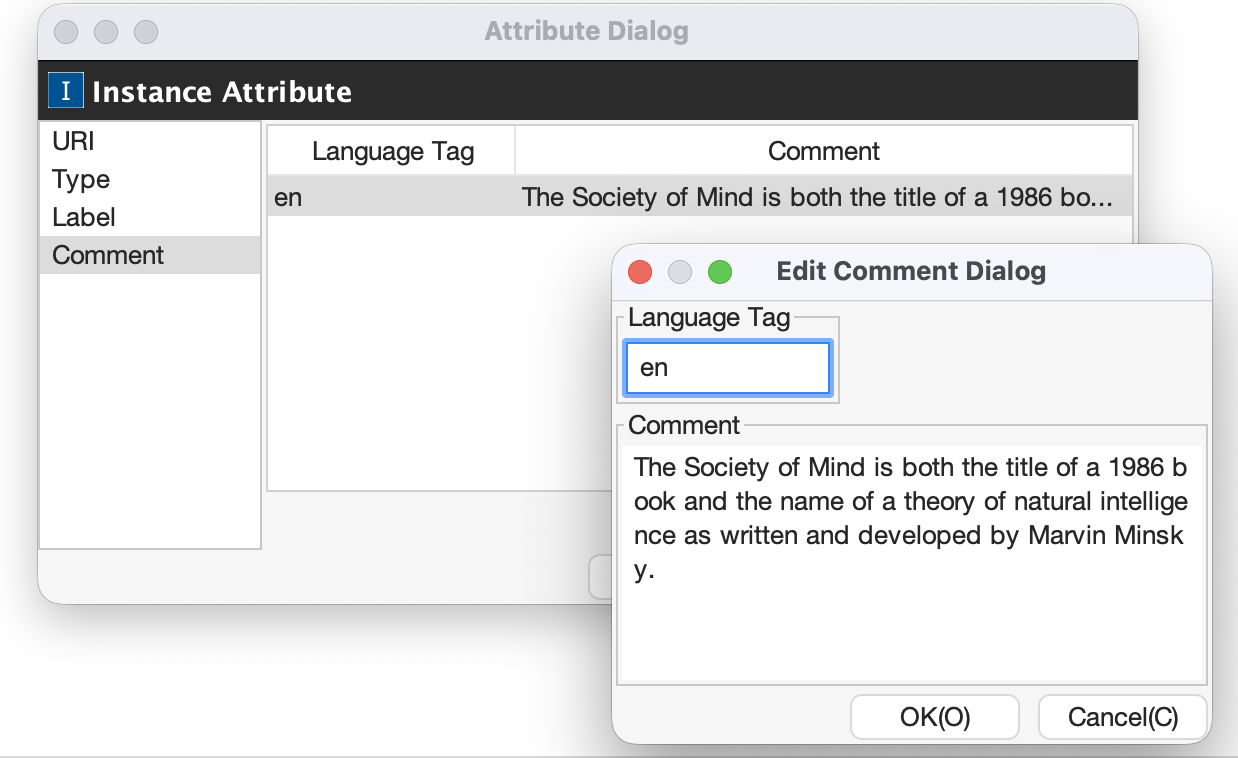
If the users would like to define the rdfs:comment of an RDF resource, the users should select [Comment] in the left side menu in the Attribute Dialog as shown in Fig. 25. After clicking the [Add] button, the [Edit Comment Dialog] is shown.
First input language in the [Lang] text field and comment in the [Comment] text area. Then, click [OK] button. After that, the language and the label are added in the table in the Attribute Dialog. If the users select a line in the table and click [Edit] button, the users can edit the selected comment and the language. In the same way, if the user select a line in the table and click [Remove] button, the selected label is removed.
Fig. 25 Attribute Dialog (Comment of an RDF resource)
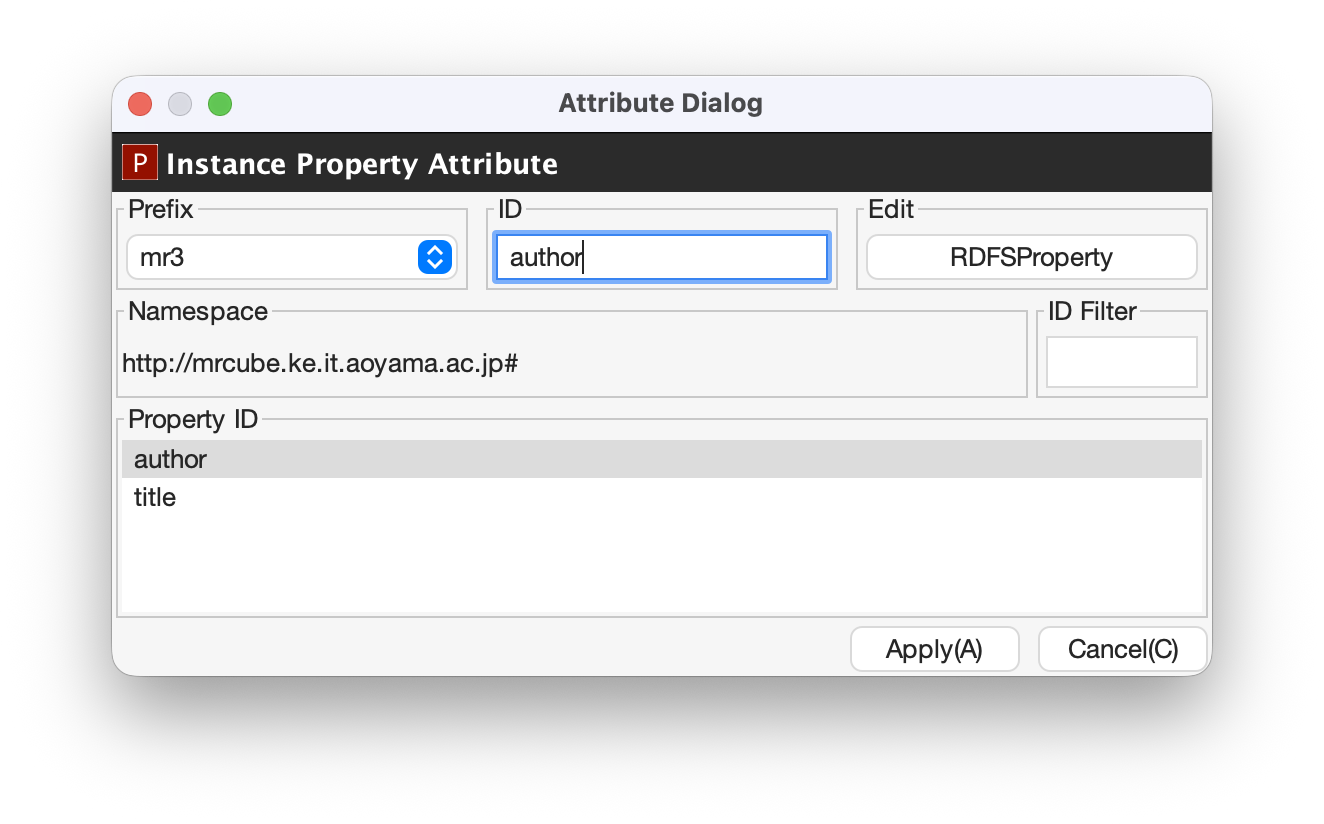
If the users select an RDF property in the Instance Editor, the attributes of the RDF property are shown in the Attribute Dialog (Fig. 26). The users can edit the URI of the selected RDF property.
When the users input a URI which is not defined in the Property Editor, [RDF(S) contents management] dialog is shown as shown in Fig. 23. In the [RDF(S) contents management] dialog, the users can select rename the RDFS property or create an RDFS property.
When the users select one of the prefixes in the dialog, IDs of RDFS properties that are defined in the Property Editor and the namespace is correspond to the selected prefix are shown in the [Property ID] list.
When the users select one of the Property IDs and click [RDFSProperty] button, the RDFS property is selected and the attributes of the RDFS property are shown in the Attribute Dialog.
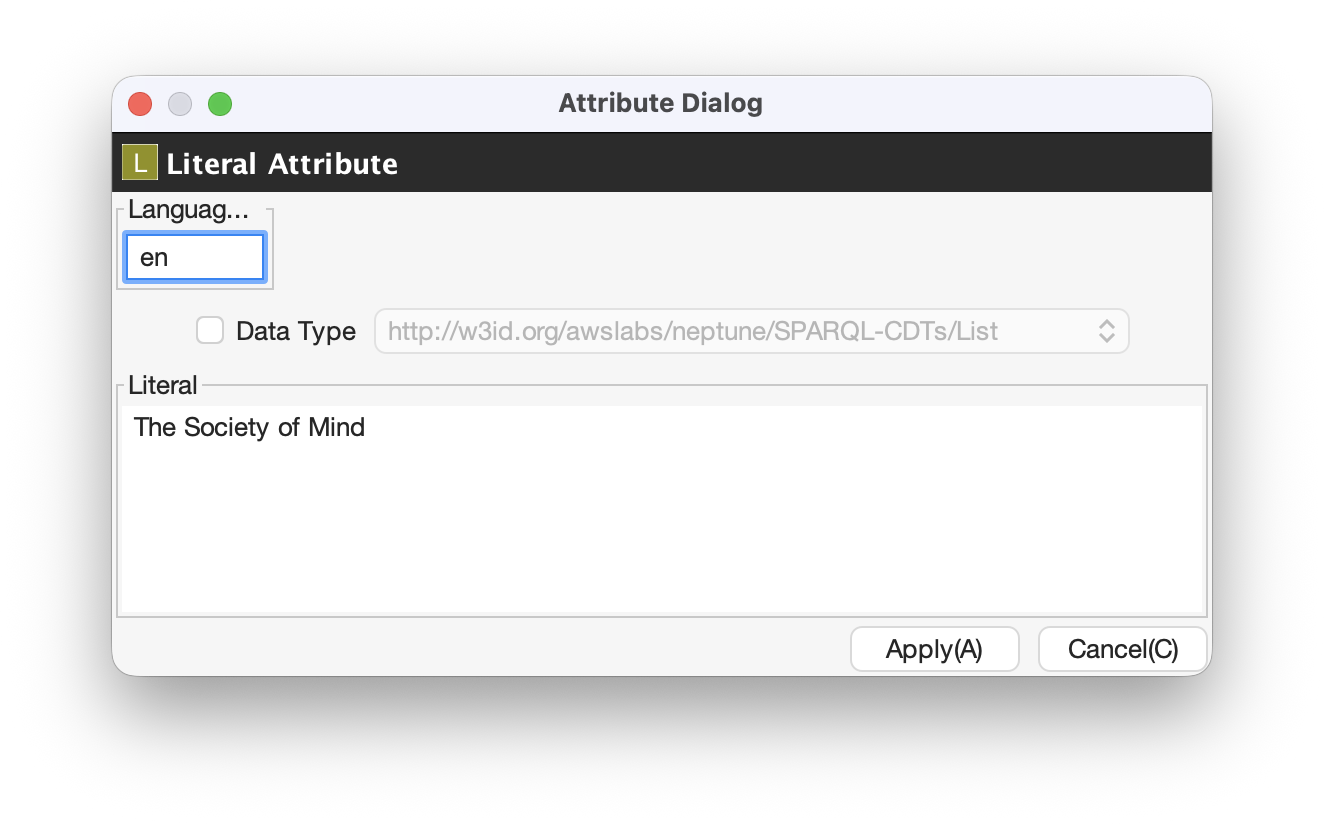
When the users select an RDF literal in the Instance Editor, the attributes of the RDF literal are shown in the Attribute Dialog. (Fig. 27) The users can edit the contents of the literal, the attribute of language (xml:lang), and the data type of the literal. In the [Literal] text are, the users can input the contents of the literal. The users can also input language in the [Lang] text field. If the users set the data type of the literal, the users should check [Data type] checkbox and select one of the types in the combobox. Language attribute and data type attribute are exclusive and the users only select one of them.
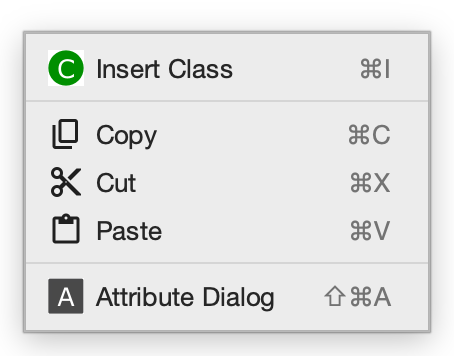
When users right click in the Class Editor, a popup menu is shown. The contents of the popu menu is different when nodes are selected or not. The popup menus are shown as follows.
Fig. 29 Popup menu when nodes in the Class Editor are not selected.
Fig. 30 Popup menu when nodes in the Class Editor are selected.
Insert Class
Insert an RDFS class to the position that the mouse is right clicked. If one or more RDFS classes are selected, an RDFS class is inserted as the sub classes of the selected classes.
Transform from Class to RDF
Transform the selected RDFS classes to RDF resources.
Transform from Class to Property
Transform the selected RDFS classes to RDFS properties.
Copy
Copy selected RDFS classes and the relationships between the classes.
Cut
Cut selected RDFS classes and the relationships between the classes.
Paste
Paste copied RDFS classes and the relationships between the classes.
Remove
Remove selected RDFS classes and the relationships between the classes.
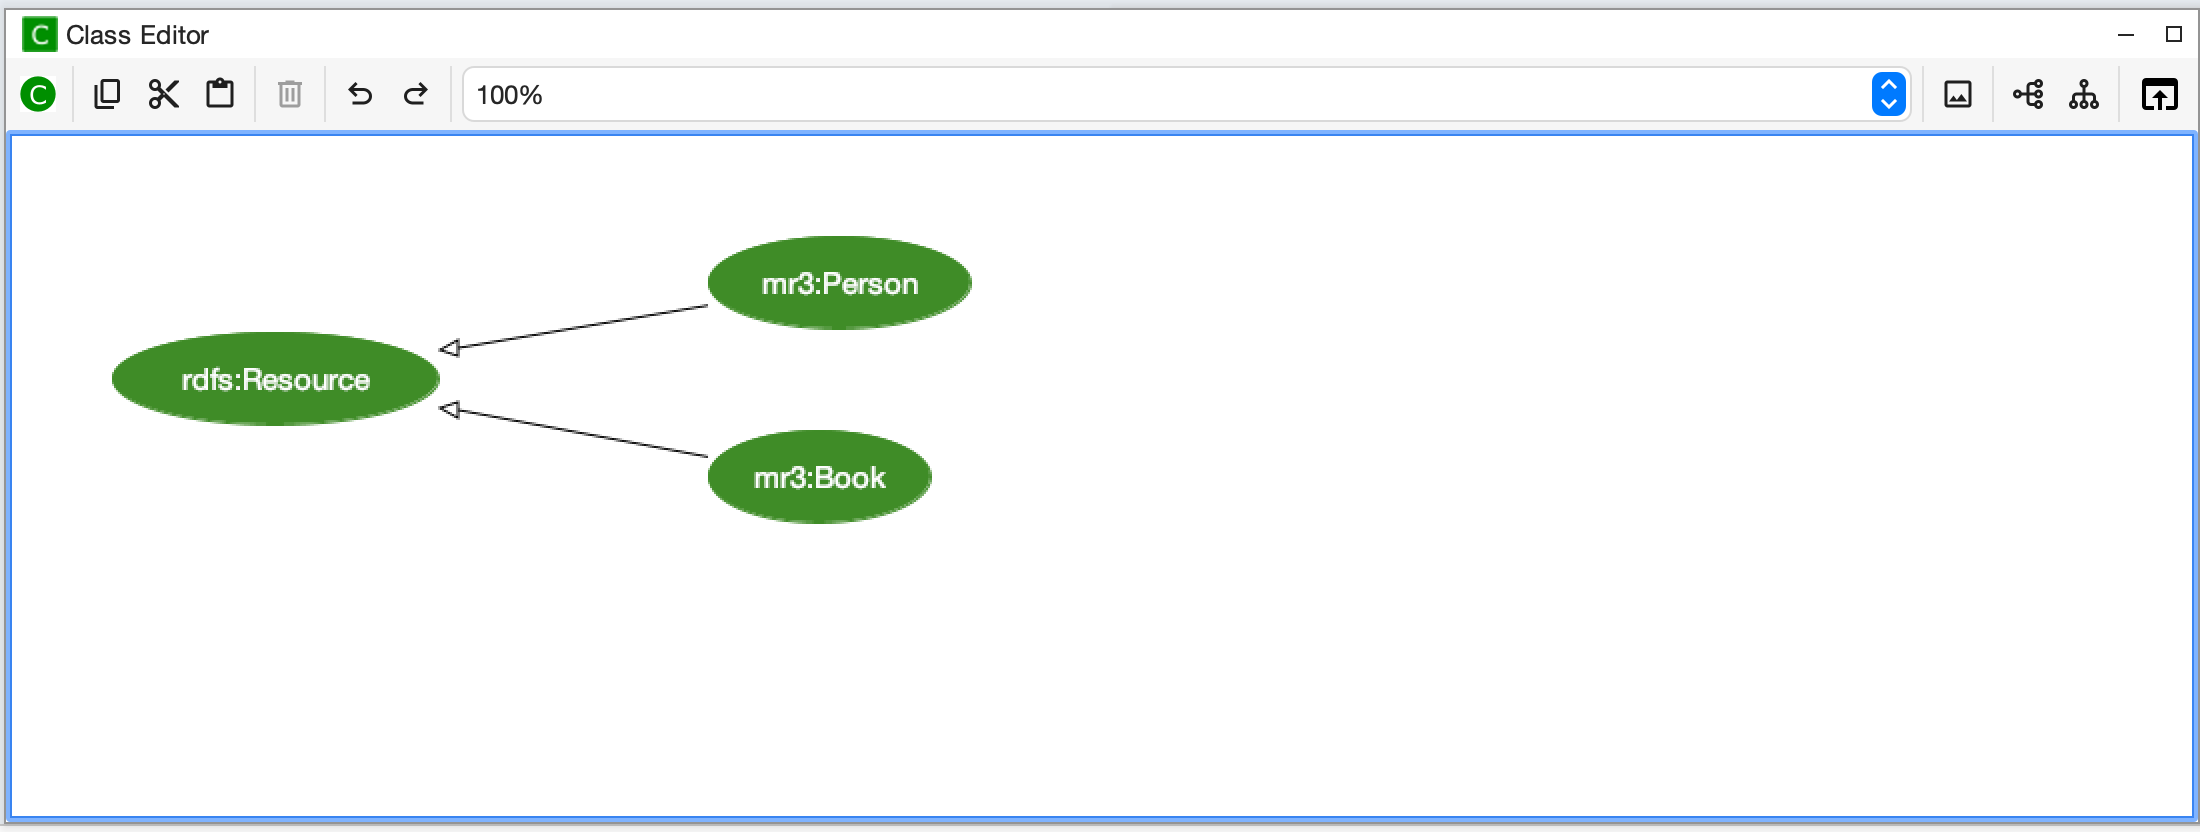
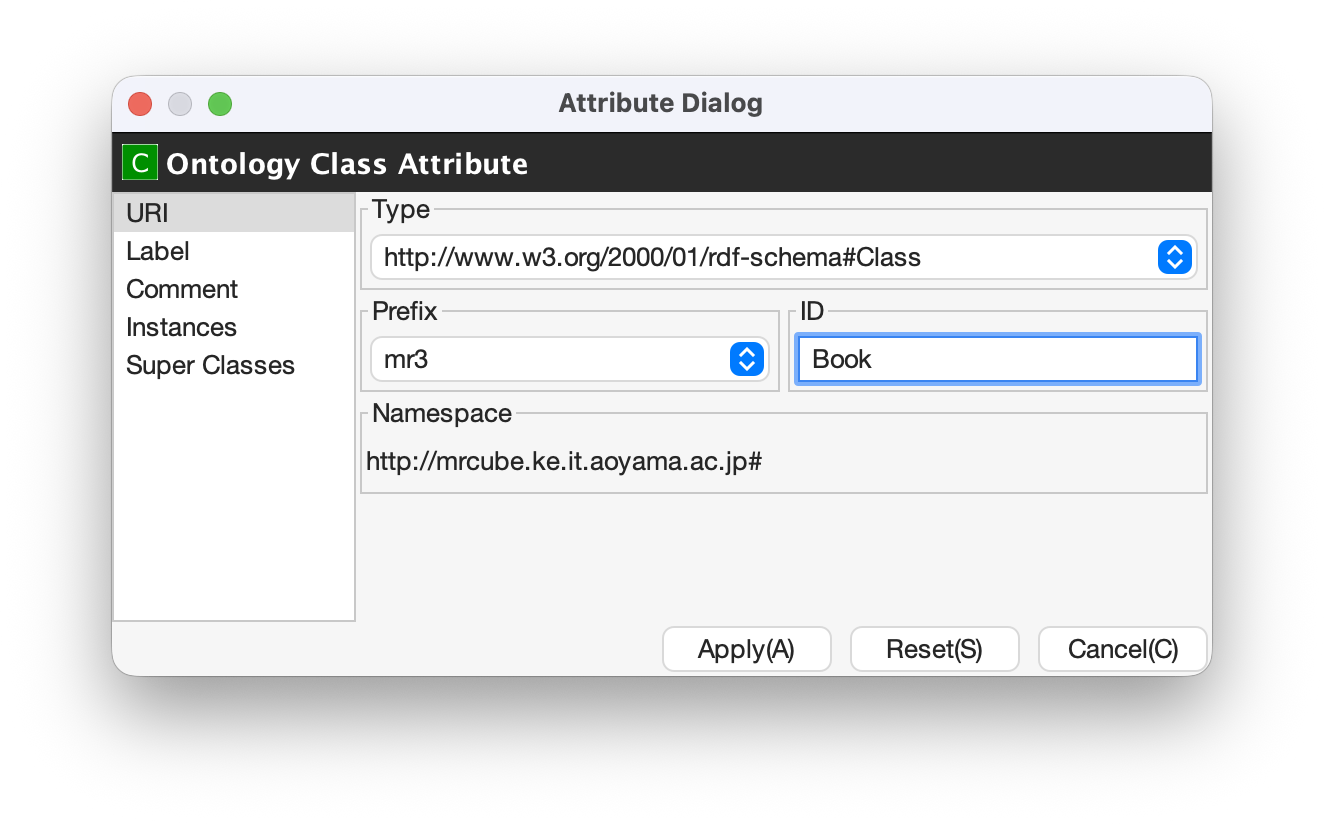
When the users select an RDFS class in the Class Editor, the attributes of the RDFS class are shown in the Attribute Dialog (Fig. 31 to Fig. 33). The users can edit the attributes of an RDFS class by selecting Base, Label, Comment, Instances, or SuperClasses items from the left side menu in the Attribute Dialog.
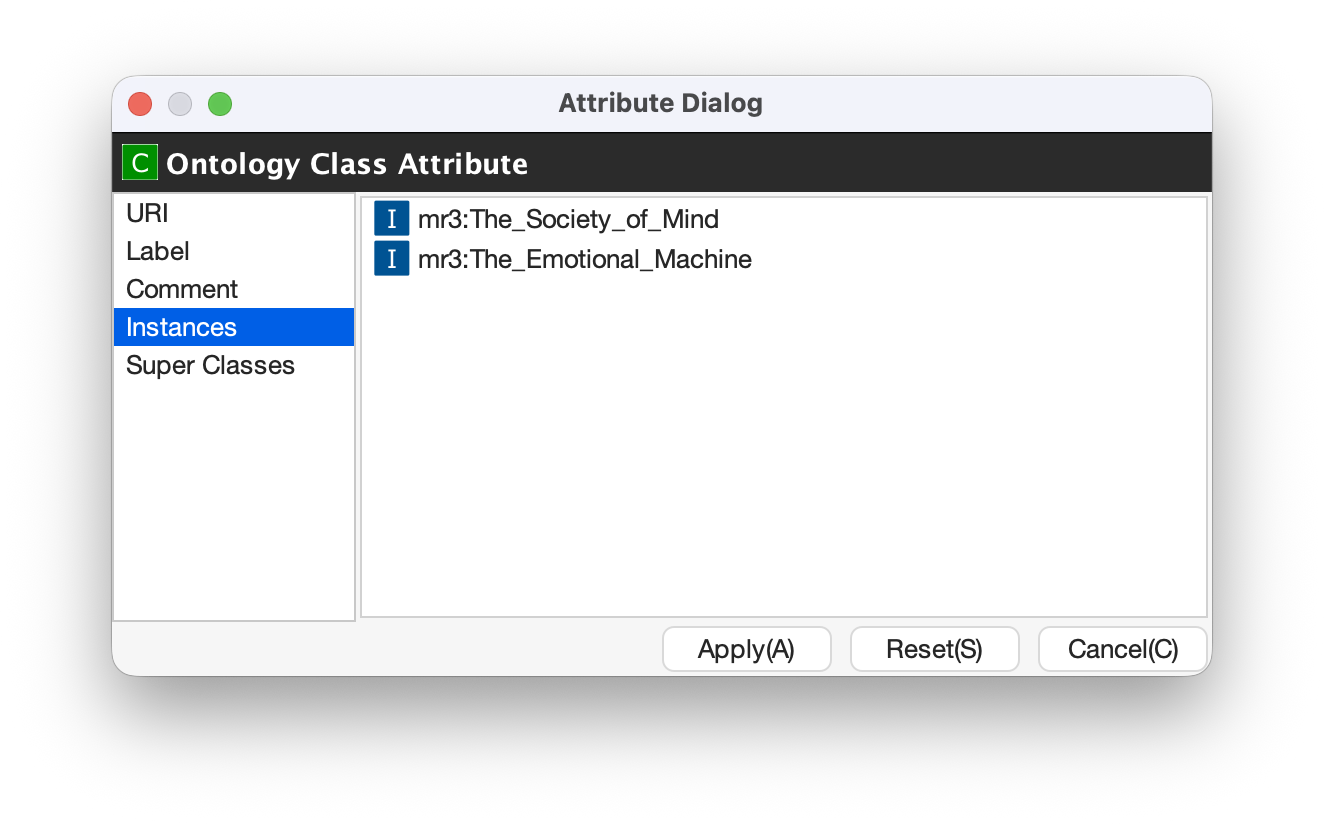
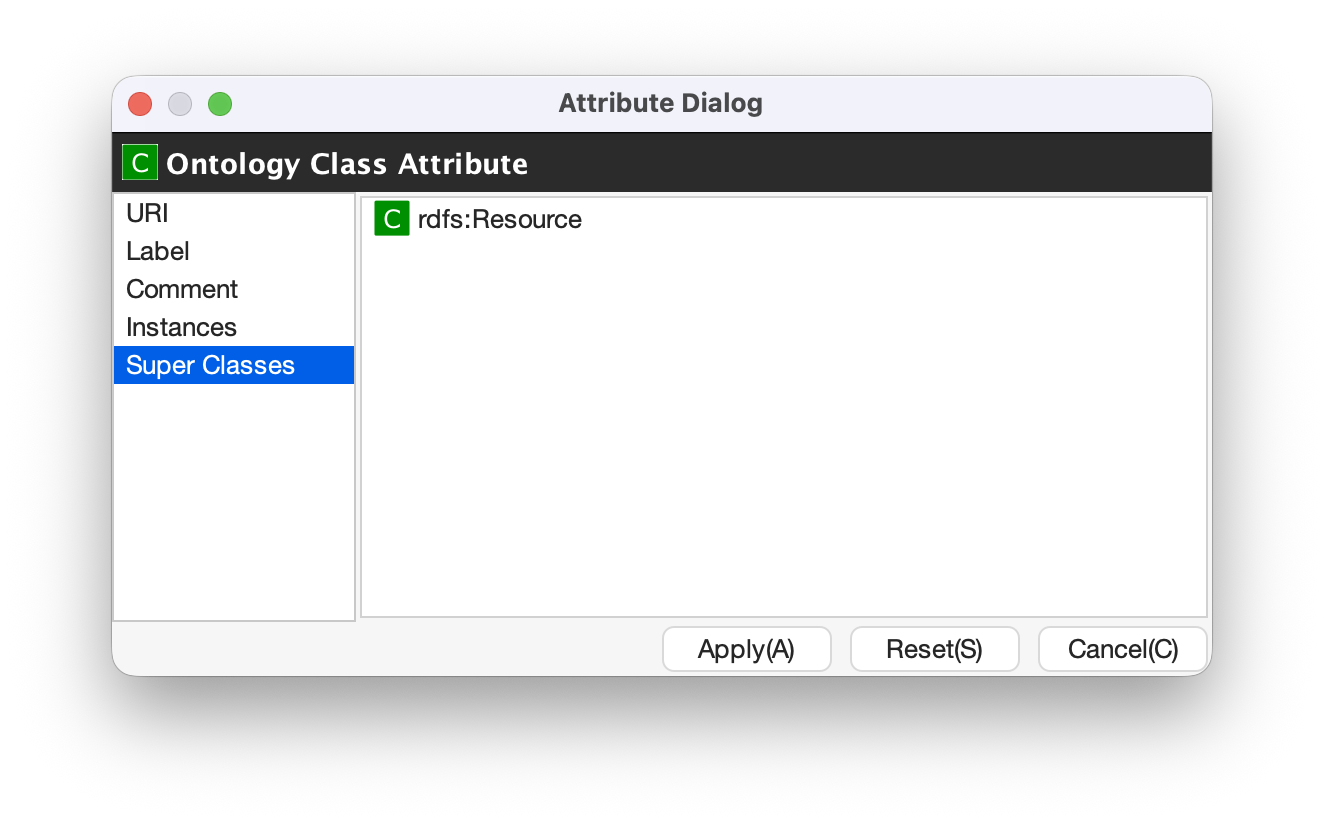
When the users select the [Base] item, the type of an RDFS class and the URI can be edited (Fig. 31). The [Resource Type] can be defined by [Class Class List] in the Option Dialog. When the users select the [Label] item, the value of rdfs:label property can be edited. When the users select the [Comment] item, the value of rdfs:comment property can be edited. The methods for editing rdfs:label and rdfs:comment are same as RDF resource. When the users select the [Instances] item, the instances of the selected RDFS class are shown in the list (Fig. 32). When the users select the one of the items in the list, corresponding RDF resource is selected and the attributes of the RDF resource are shown in the Attribute Dialog. When the users select the *[SuperClasses] item, the super classes of the selected RDFS class are shown in the list (Fig. 33).
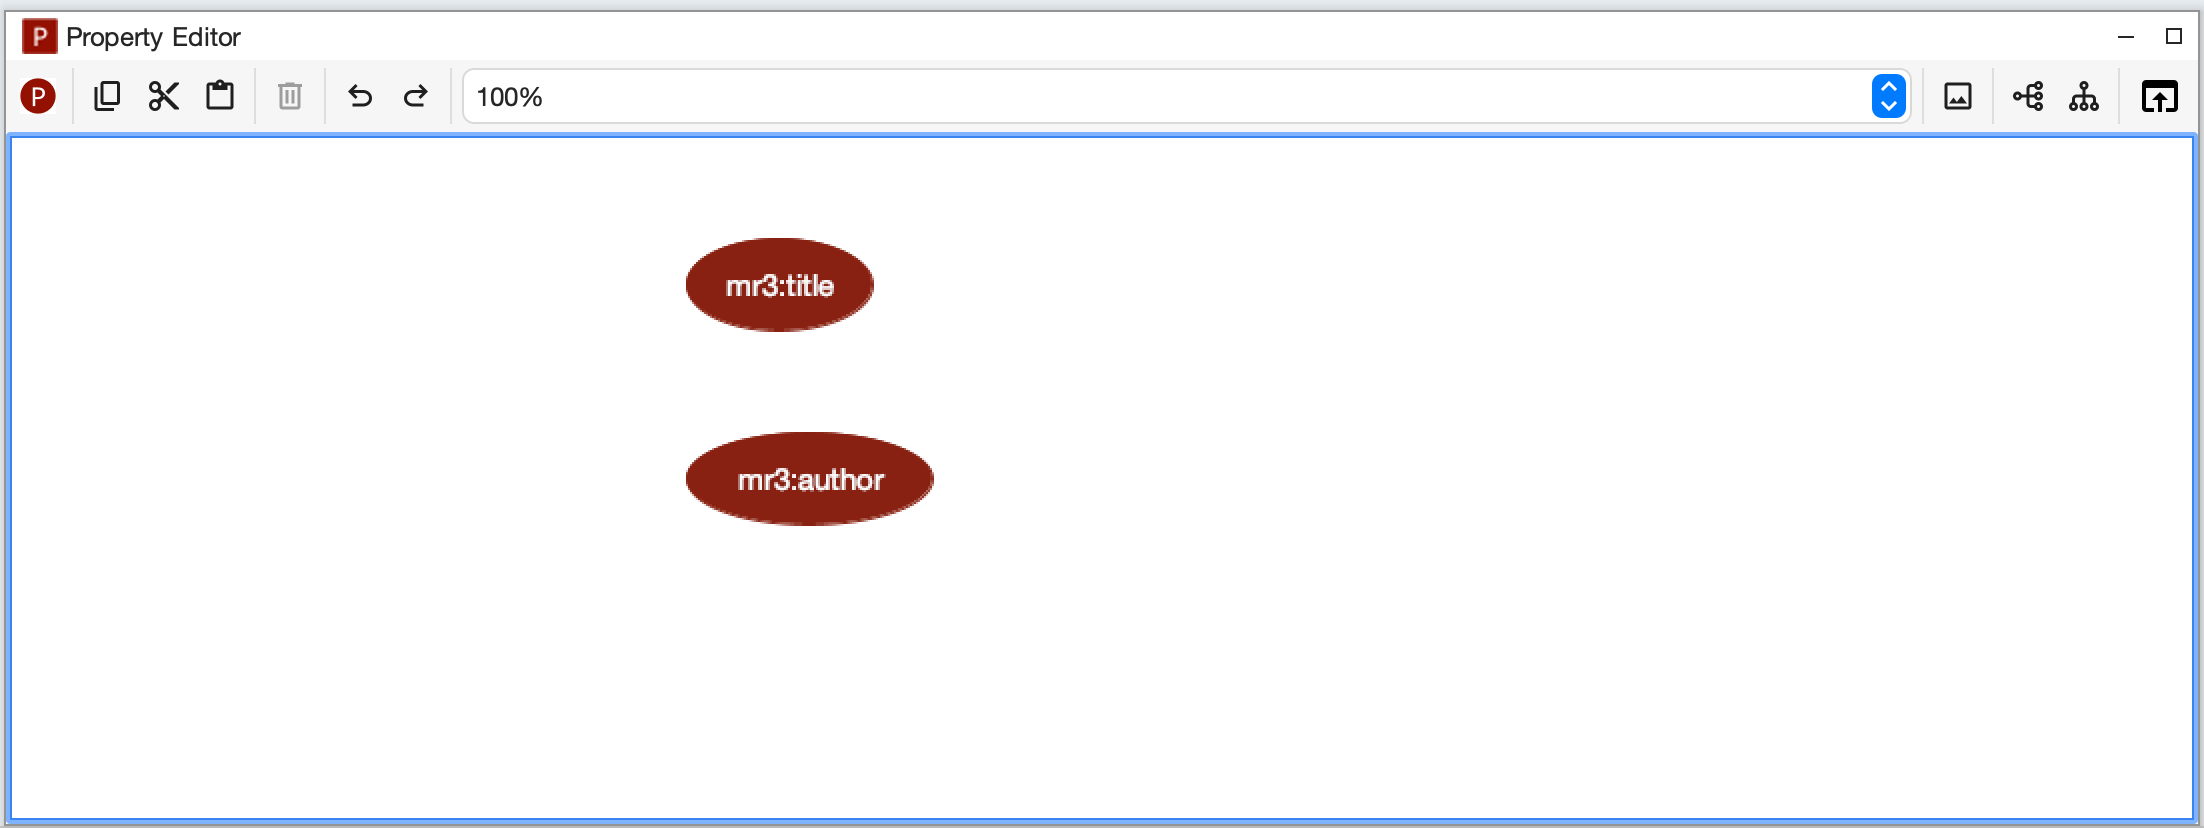
When users right click in the Property Editor, a popup menu is shown. The contents of the popu menu is different when nodes are selected or not. The popup menus are shown as follows.
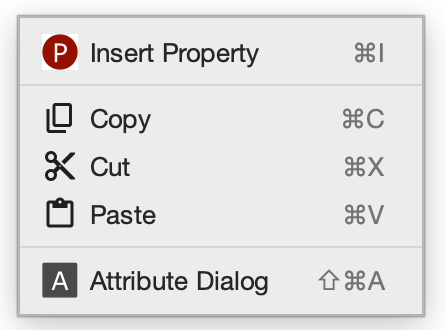
Fig. 35 Popup menu when nodes in the Property Editor are not selected.
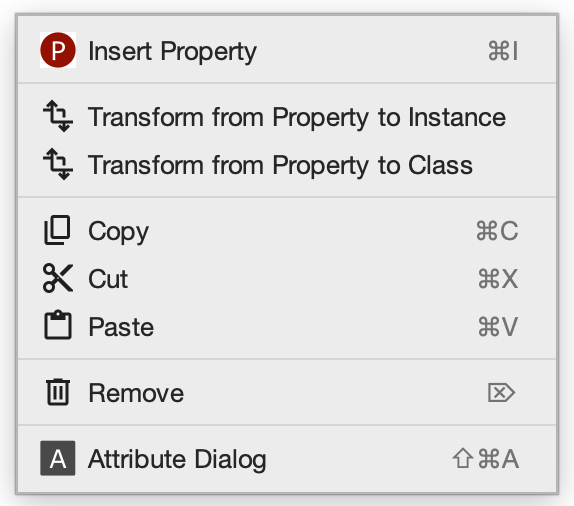
Fig. 36 Popup menu when nodes in the Property Editor are selected.
Insert Property
Insert an RDFS property to the position that the mouse is right clicked. If one or more RDFS properties are selected, an RDFS property is inserted as the sub properties of the selected properties.
Transform from Property to RDF
Transform the selected RDFS properties to RDF resources
Transform from Property to Class
Transform the seledcted RDFS properties to RDFS classes
Copy
Copy the selected RDFS properties and the relationships between the properties
Cut
Cut the selected RDFS properties and the relationships between the properties
Paste
Paste the copied RDFS properties and the relationships between the properties
Remove
Remove the selected RDFS properties and the relationships between the properties
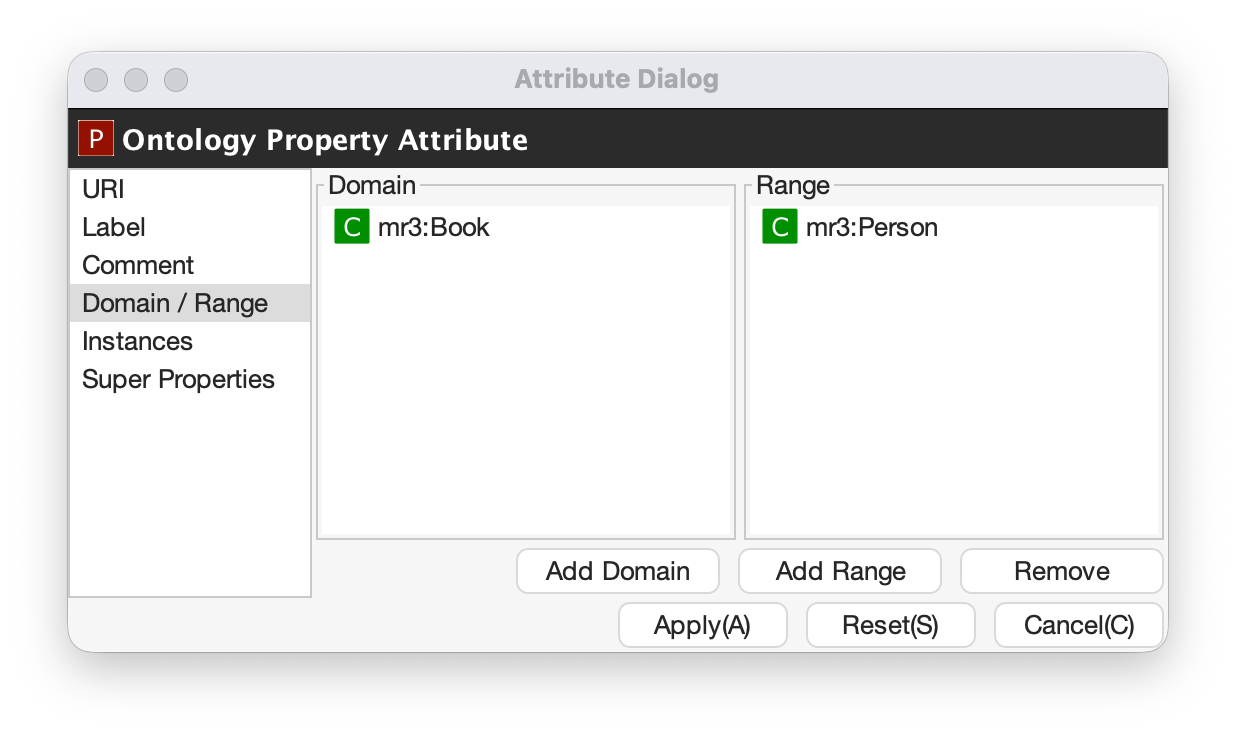
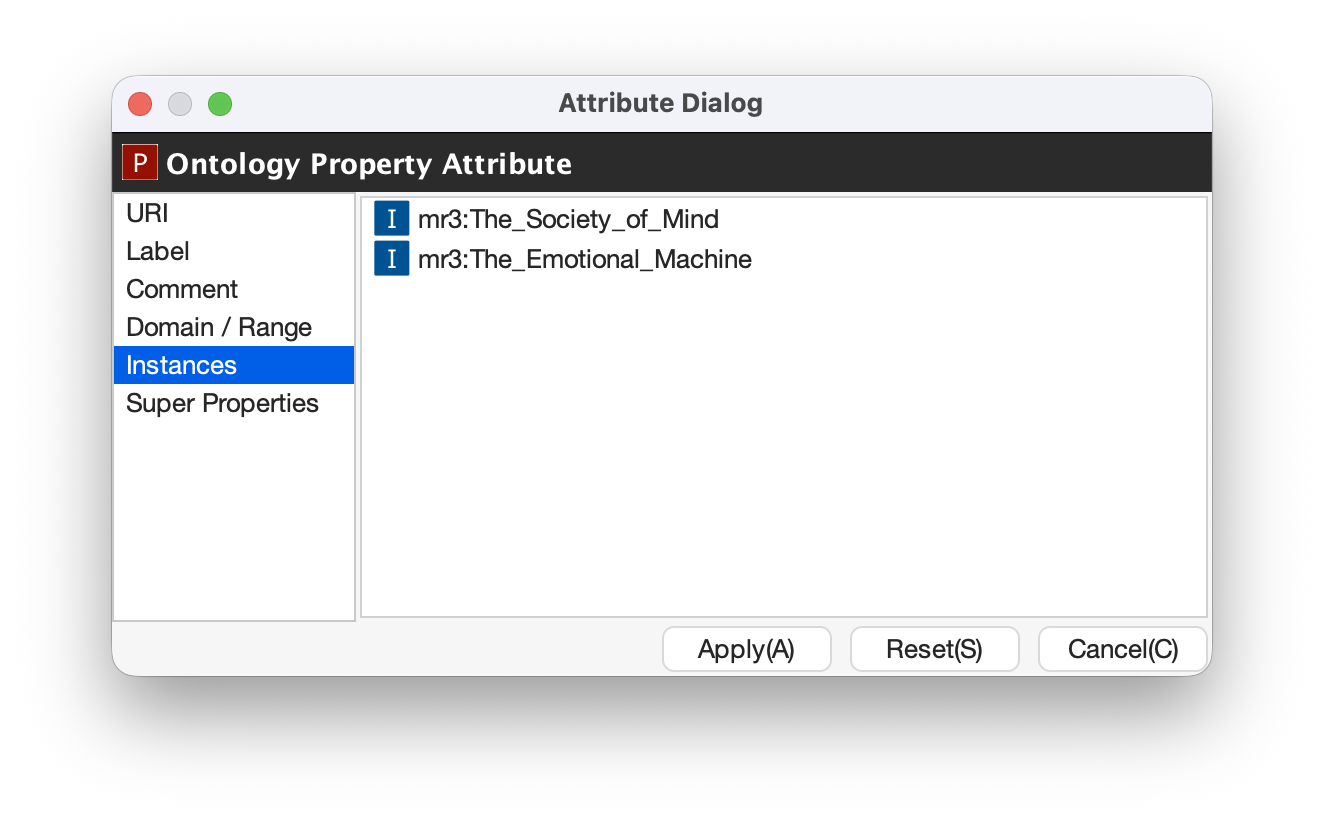
When the users select an RDFS property in the Property Editor, the attributes of the RDFS property are shown in the Attribute Dialog (Fig. 37 and Fig. 38). The users can edit the attributes of an RDFS property by selecting [Base], [Label], [Comment], [Domain/Range], [Instances], or [SuperProperties] items in the left side menu of the Attribute Dialog. [Base], [Label], and [Comment] items are same as RDFS Class. The [Resource Type] list in the [Base] item can be defined by the [Property Class List] in the Option Dialog. When the users select [Domain/Range] item, domains and ranges of the selected RDFS property can be edited (Fig. 37). When the users select [Instances] item, RDF resource list that have the selected RDFS property is shown in the Attribute Dialog (Fig. 38). When the users select the one of the items in the list, the RDF resource is selected and the attributes of the RDF resource are shown in the Attribute Dialog. When the users select [SuperProperties] item, super properties of the selected RDFS property are shown in the list.
Fig. 37 Attribute Dialog (Range of RDFS property)
Fig. 38 Attribute Dialog (Instances of RDFS property)
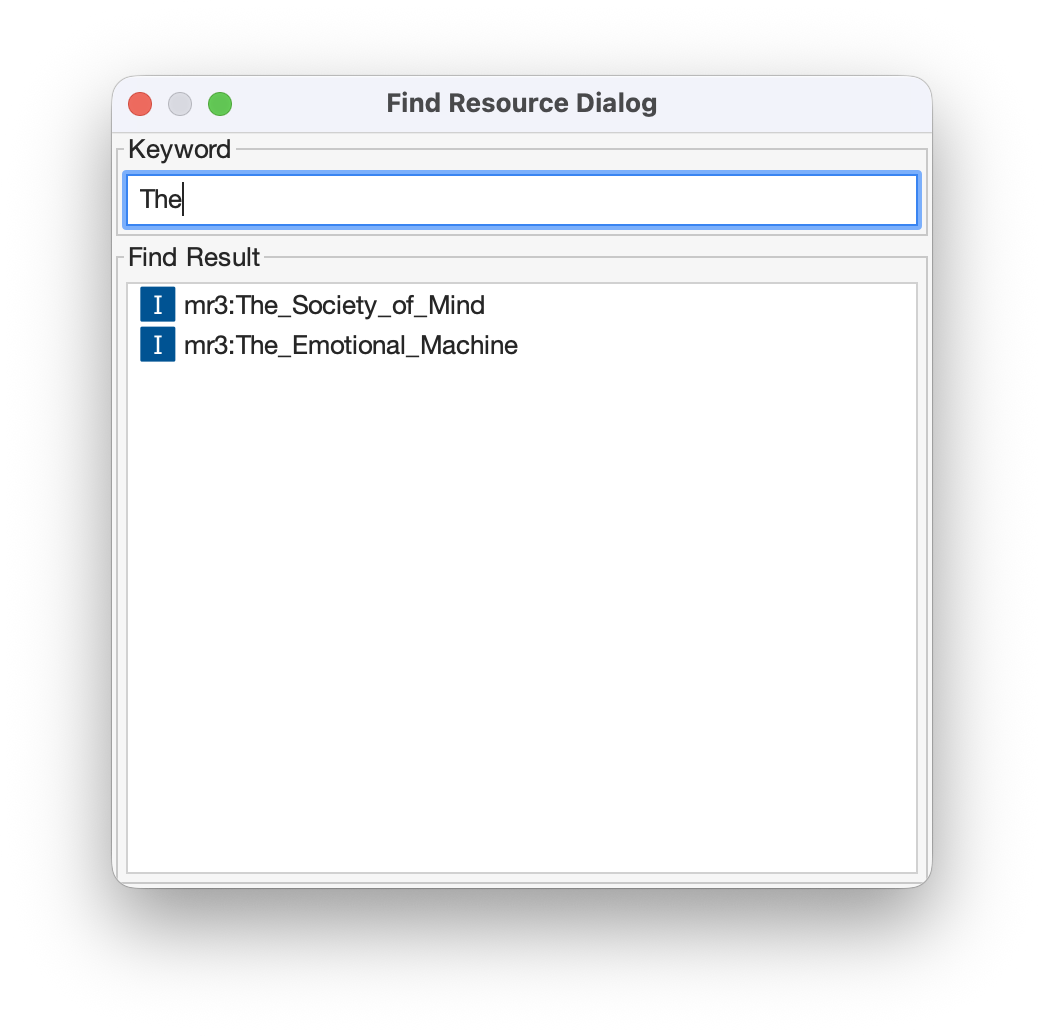
The users can find resources (RDF resources, RDF properties, RDFS classes, and RDFS properties) by using Find Resource Dialog. Fig. 39 shows a screenshot of the Find Resource Dialog. When the users enter a string in the [Keyword] text field, the corresponding resource list is displayed in the [Find Result] list at the bottom of Fig. 39. The serach targets are URIs, labels, and comments of RDFS classes, properties, and RDF resources. When the users select the one of the items in the list, corresponding resource is selected and the attributes of the resource are shown in the Attribute Dialog.
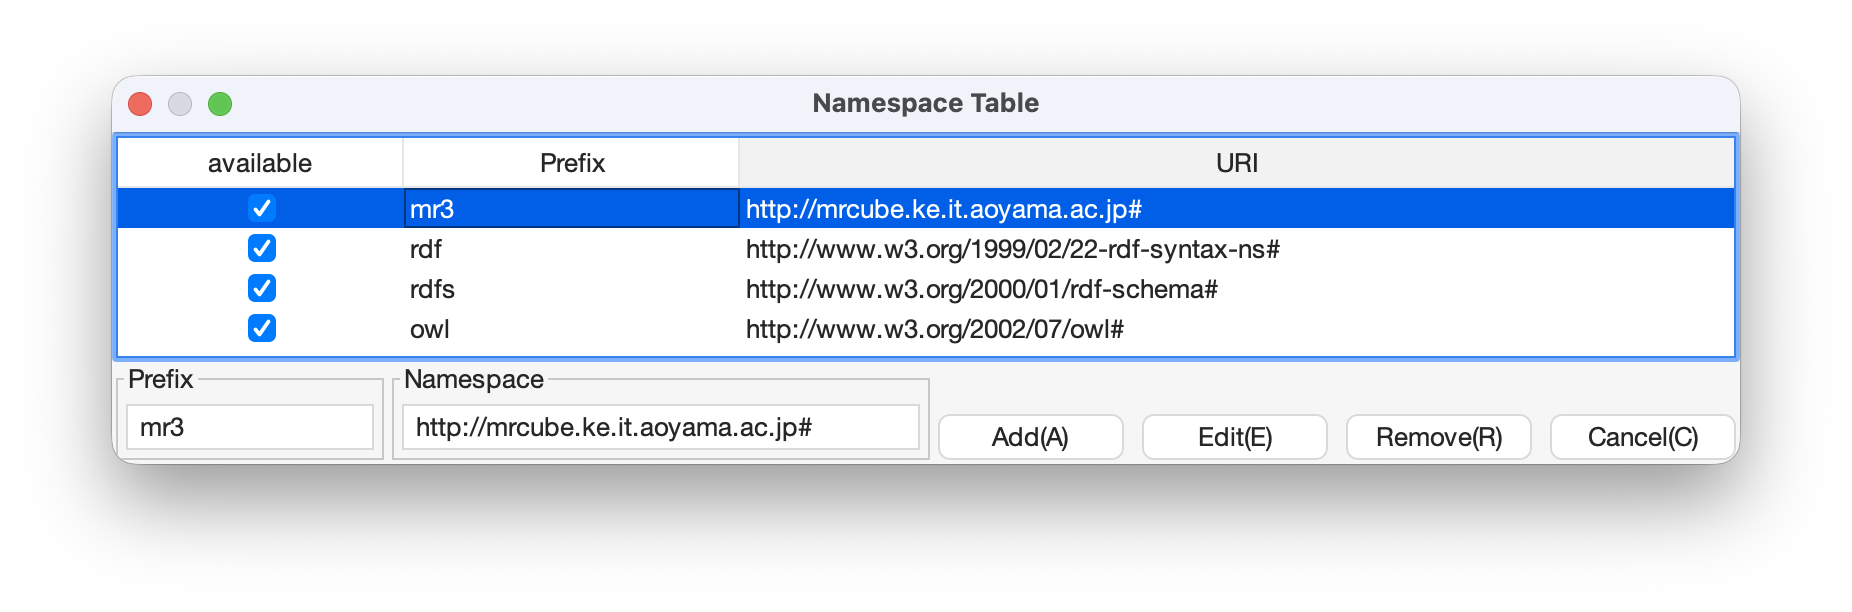
The users can register perfixes and the corresponding namespaces in the Namespace Table. Fig. 40 shows a screenshot of the Namespace Table. When the users set a prefix in the [Prefix] text field, set a namespace in the [NameSpace] text field, and click [Add] button, the prefix and the namespace are added in the table in the Namespace Table. If the users would like to remove the prefix and the corresponding namespace, select the line in the table and click [Remove] button. If the users check the available checkbox, namespaces of resources in each editor are replaced with the corresponding prefix (This function is only available when the View->URI menu is selected.). When the users set a URI of an resource, the Namespace Table is referred and the users can select the registered prefixes in the Attribute Dialog. When the users select one of the prefixes, the corresponding namespace is shown in the [Namespace] label or [RDF Resource] text field.
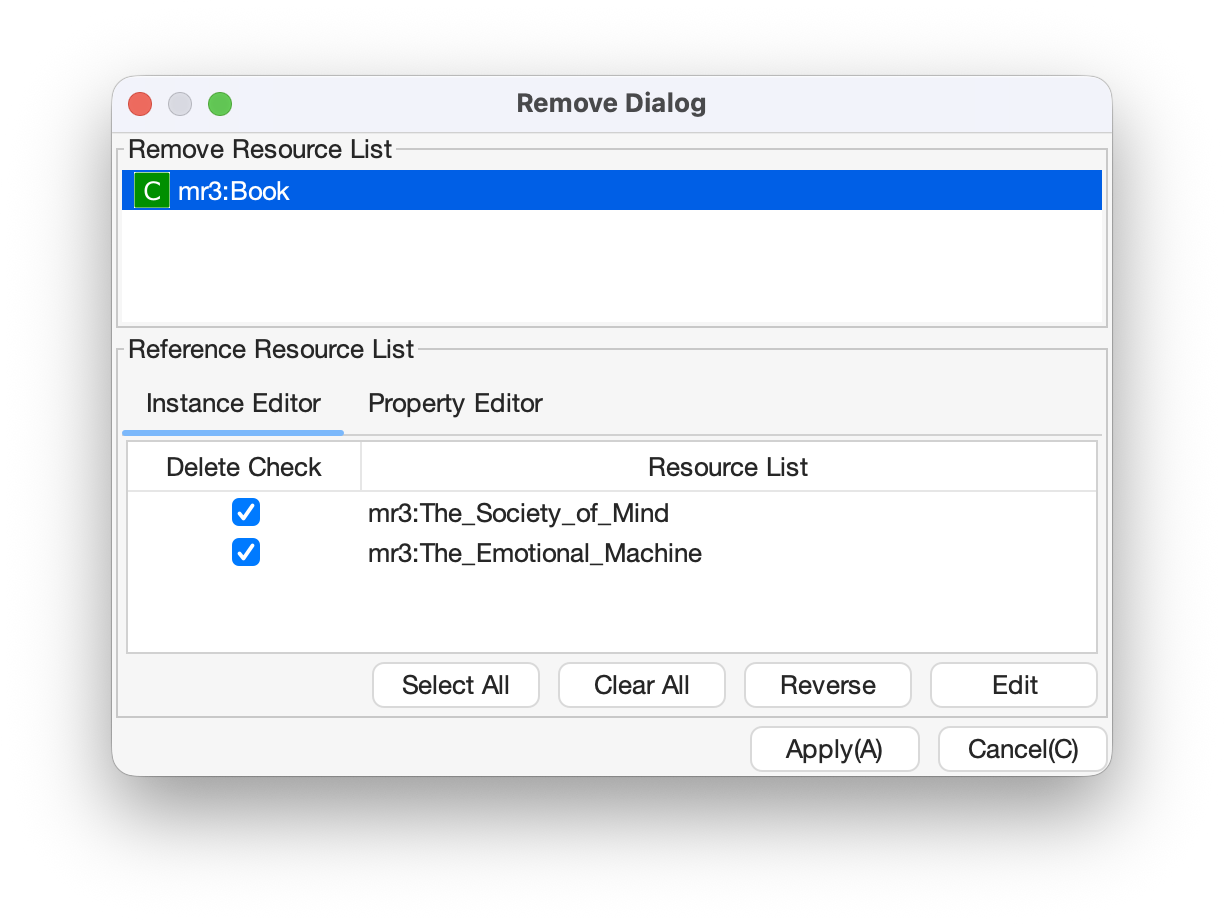
If an RDFS class is referred by a type of a resource or a domain or a range of a property, it is inconsistency when the RDFS class is removed. If an RDFS property is reffered in the Instance Editor, it is inconsistency when the RDFS property is removed. In these cases, when the users remove those RDFS classes or properties, the Remove Dialog as shown in Fig. 41 is shown before removing them actually.
Removed RDFS classes or properties are shown in the upper part of Fig. 41. RDF resources that referred the removed RDFS classes as their type are shown in the [Instance Editor] tab in the lower part of Fig. 41. RDF properties that referred the removed RDFS properties are also shown in the [Instance Editor] tab. RDFS properties that refer removed RDFS classes as their domains or ranges are shown in the [Property Editor] tab in the lower part of Fig. 41.
If the users check the [Delete Check] Checkboxes and click [Apply] button, RDF resources, RDF properties, and RDFS properties that listed in the lower part of the Remove Dialog stop referring to the removed RDFS classes or RDFS properties. Then, the RDFS classes and RDFS properties are actually removed.
If the users select one of the RDF resources, RDF properties, or RDFS properties, attributes of the selected resource are shown in the Attribute Dialog. Then, the users can edit the attributes to maintain consistency.
The users can import RDF(S) documents described as Turtle, JSONLD, RDF/XML, N-Triples, or mr3 format to MR3 by using Import Dialog. Fig. 42 shows a screenshot of the Import Dialog. The users can open Import Dialog by clicking [Open] sub menu in the [File] menu or clicking icon in the Toolbar.
First, select a file that the users want to open. Then, select a file format from the [Files of Type]. Finally, select [Open] button.
If the users select [All Files] from the [Files of Type], the file format is automatically detected from the extension of the file. The correspondence between the extension and the file format is shown below.
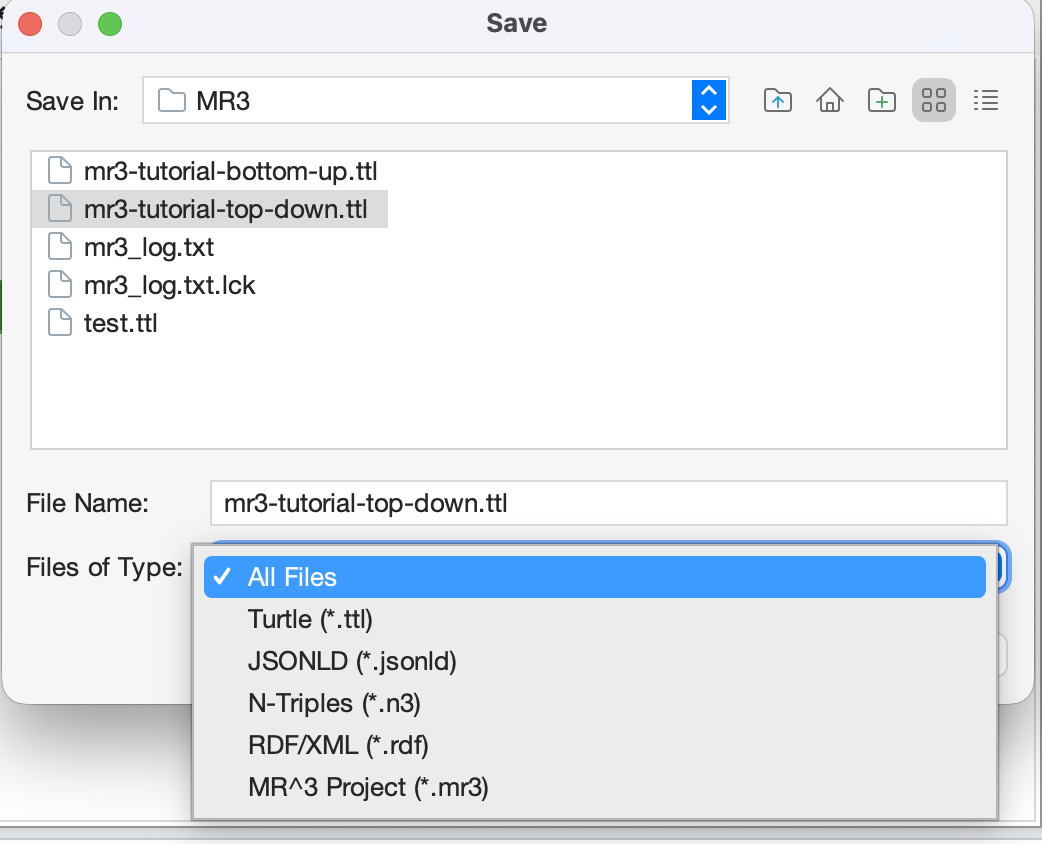
The users can export RDF(S) data graphs in MR3 to an RDF(S) document as Turtle, JSONLD, RDF/XML, N-Triples, or mr3 syntax by using the Export Dialog. Fig. 43 shows a screenshot of the Export Dialog. The users can open Export Dialog by clicking [Save As] sub menu in the [File] menu or clicking icon in the Toolbar.
First, select a file that the users want to save. Then, select a file format from the [Files of Type]. Finally, select [Save] button. If the users select [All Files] from the [Files of Type], the file format is automatically detected from the extension of the file.
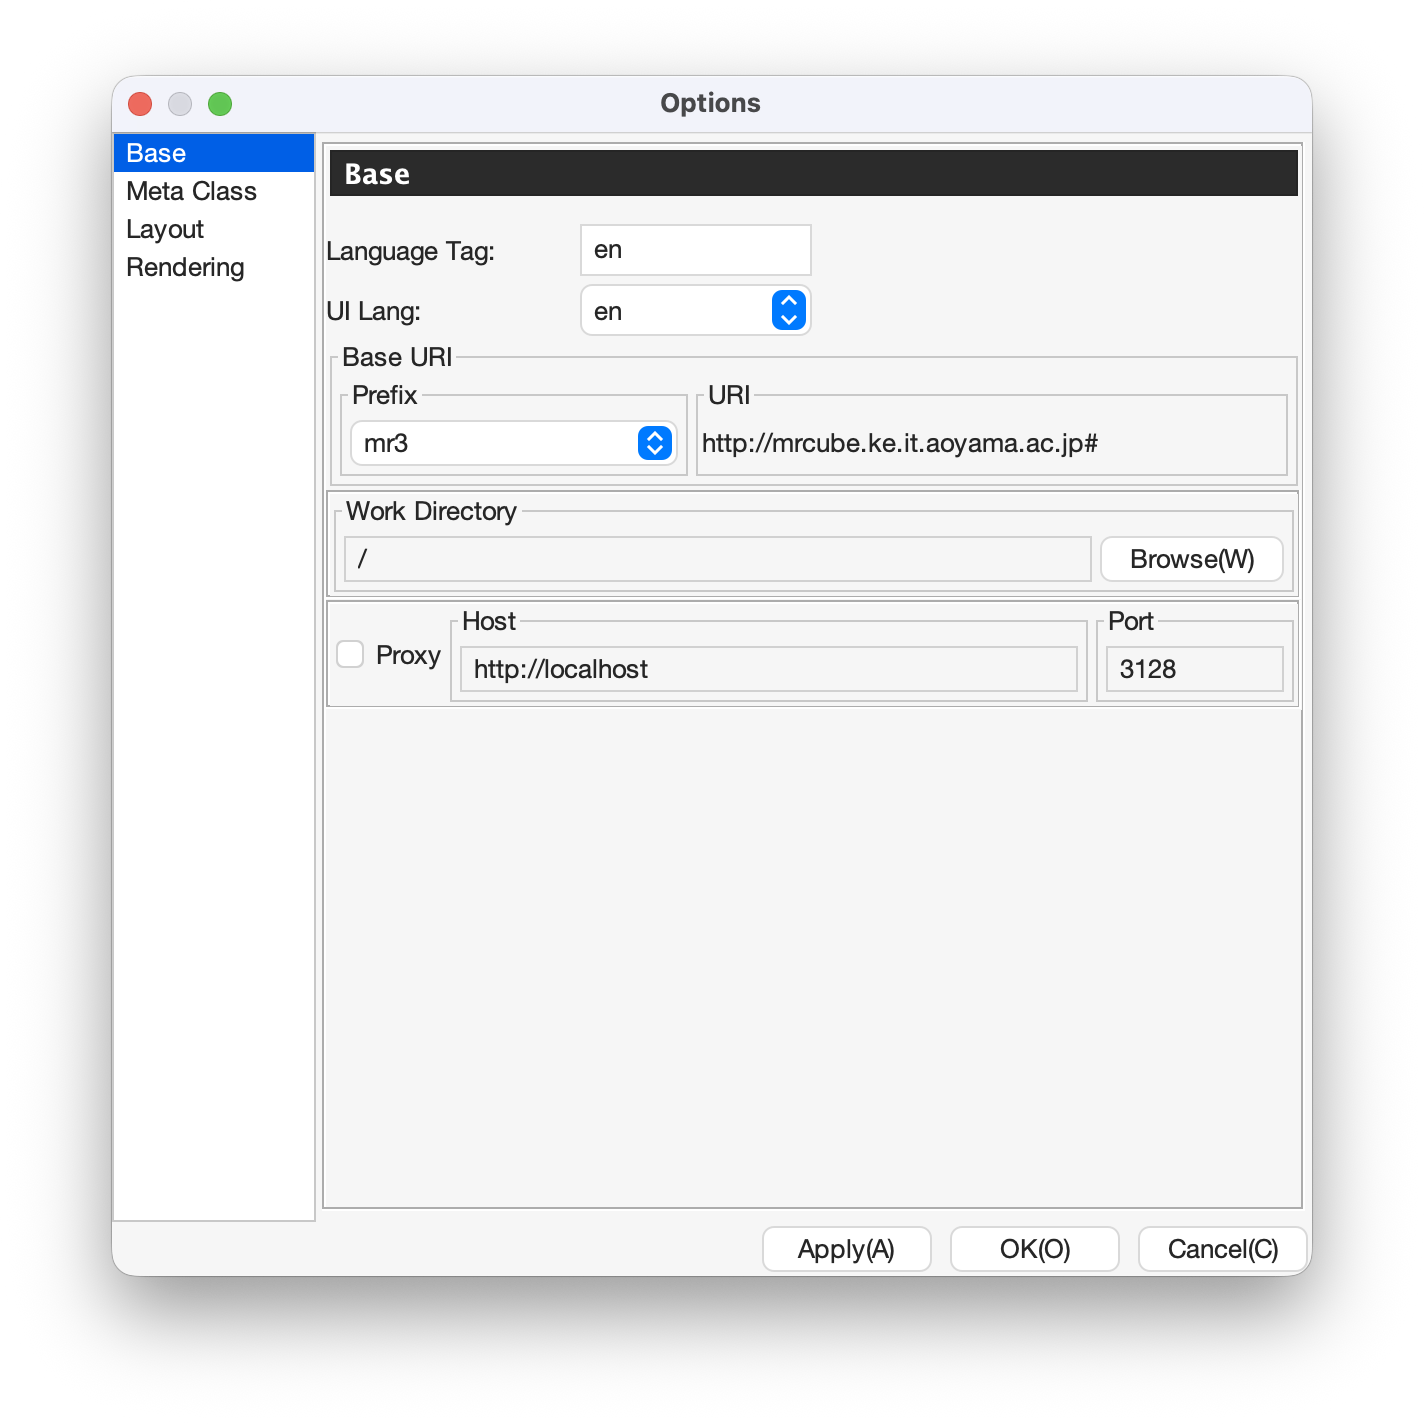
When the users select the [Base] item as shown in Fig. 44, language, UI language, base URI, work directory, and proxy can be set. If a resource has many multilingual labels, the users should select the prior language. The prior language of labels can be set in the [Lang] text field. Labels with prior language are shown in each resource when the user select View->label menu. Language of UI such as menu can be set in the [UILang] combobox. The users can select ja (Japanese), en (English), or zh (Chinsese) from the [UILang] combobox. Default namespace is set based on the [Base URI]. The work directory is a directory that is opened firstly when the users import an RDF(S) document. When the users check [Proxy] checkbox, a host name and a port number of a proxy server can be set. This configuration is necessary to import an RDF(S) document from a URI when the user’s environment is under a proxy server.
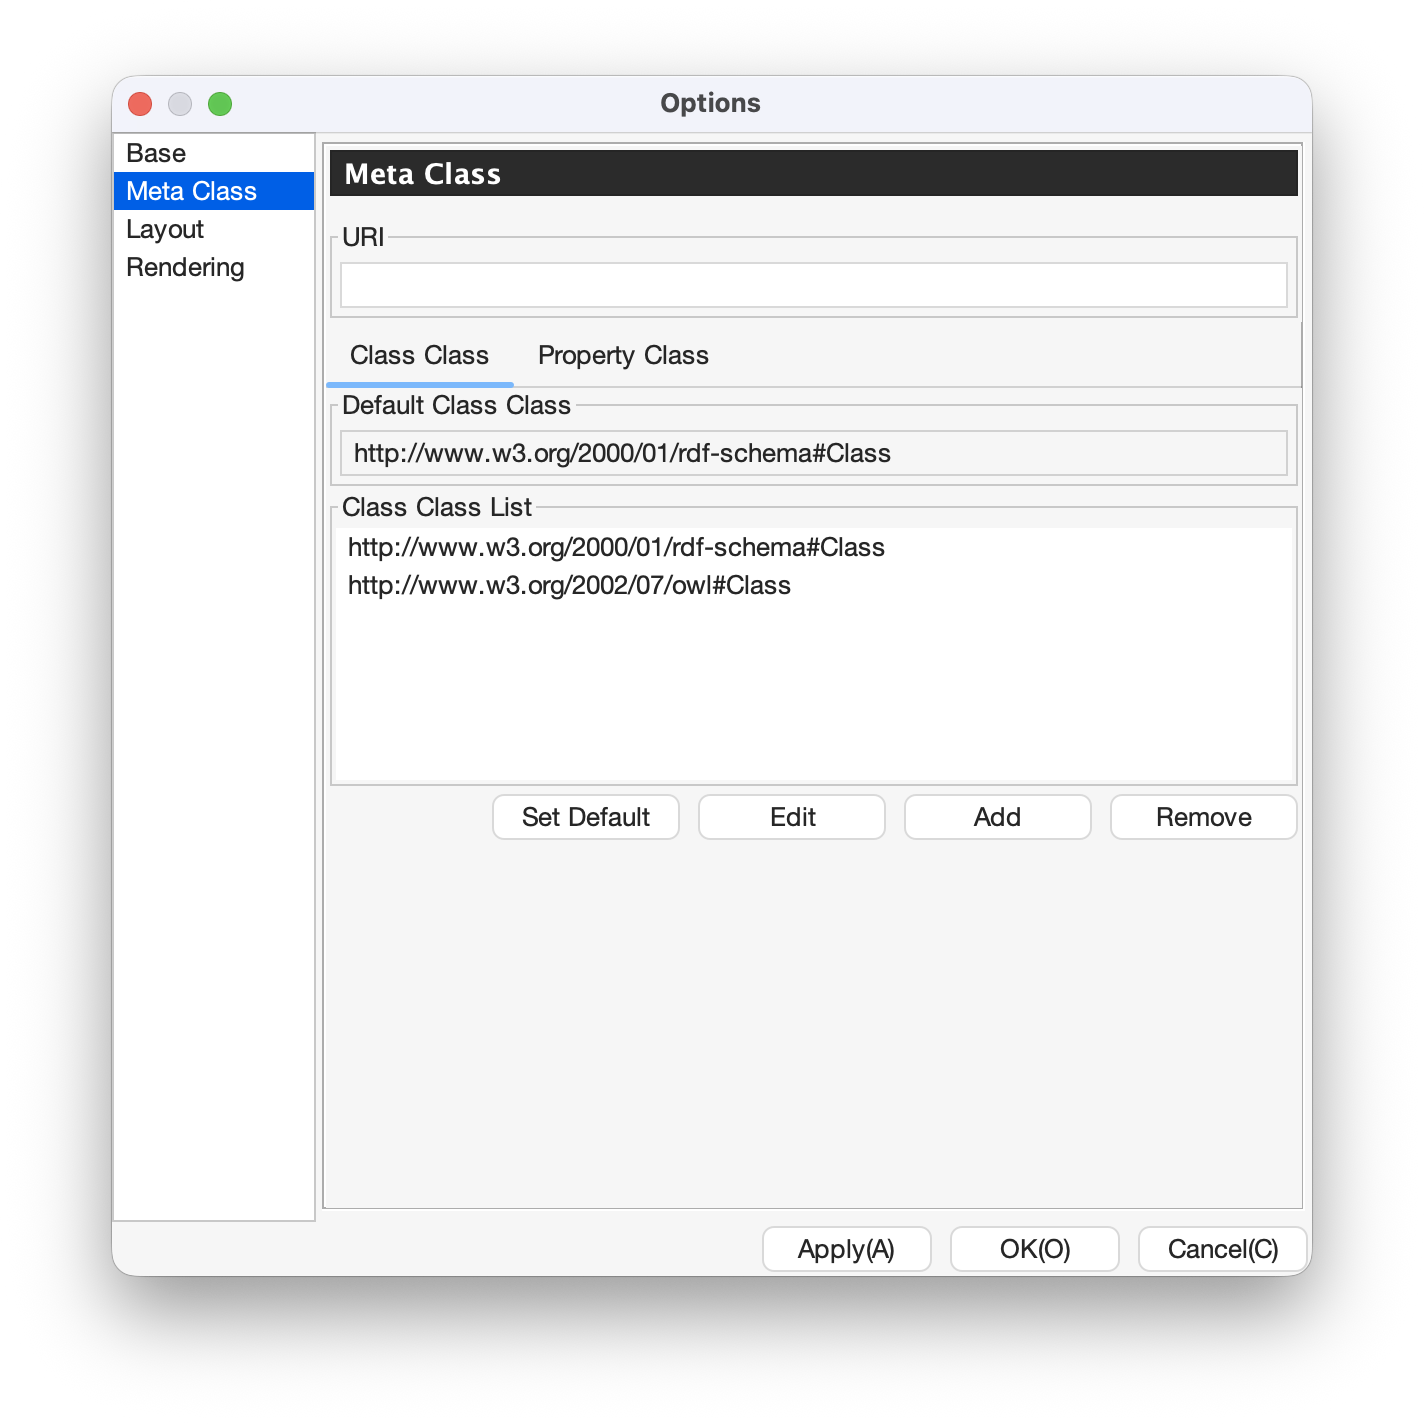
When the users select the [Meta Class] item as shown in Fig. 45, [Class Class] and [Property Class] can be set. If the users set a Class Class, MR3 regards resources that have the Class Class as their type as classes. If the users set a Property Class, MR3 regards resources that have the Property Class as their type as properties. These classes and properties are imported in the Class Editor or Property Editor.
In the initial setting, rdfs:Class is defined in Class Class and rdf:Property is defined in Property Class. If the users would like to import OWL classes and properties, owl:Class must be set as Class Class, owl:ObjectProperty and owl:DatatypeProperty must be set as Property Class.
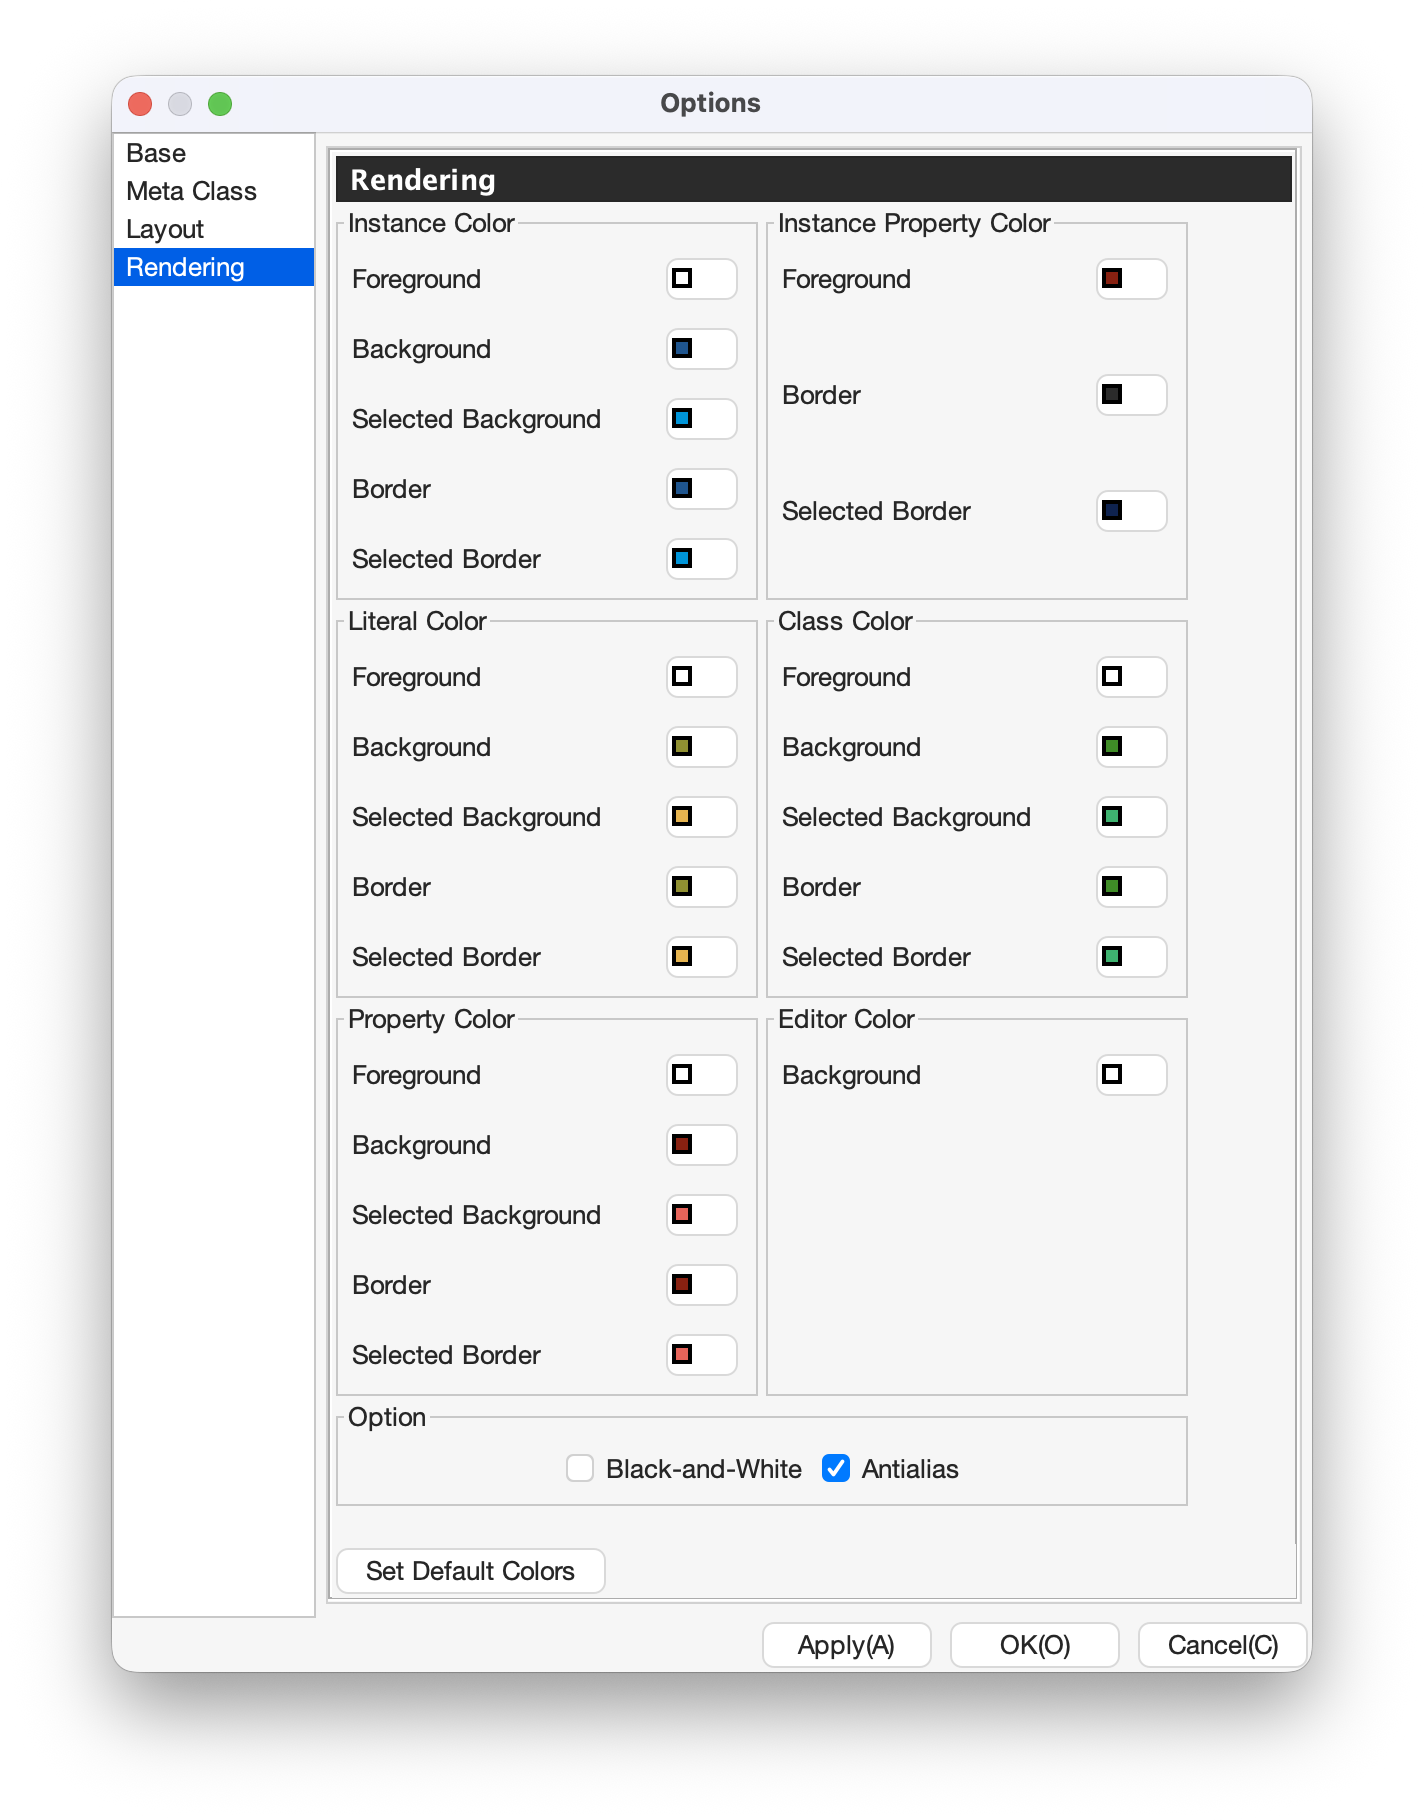
When the users select the [Rendering] item as shown in Fig. 47, the colors (text display color, background color, selected background color, line color, and selected line color) for the data graph components (RDF resources, RDF properties, RDF literals, classes, properties, editors) in each editor can be set. Check the [Black-and-White] checkbox to change all colors to black and white. Check [Antialias] to make jaggies (pixel jagged) less noticeable. You can reset the colors of all elements to their initial values by pressing the [Set Default Colors] button.
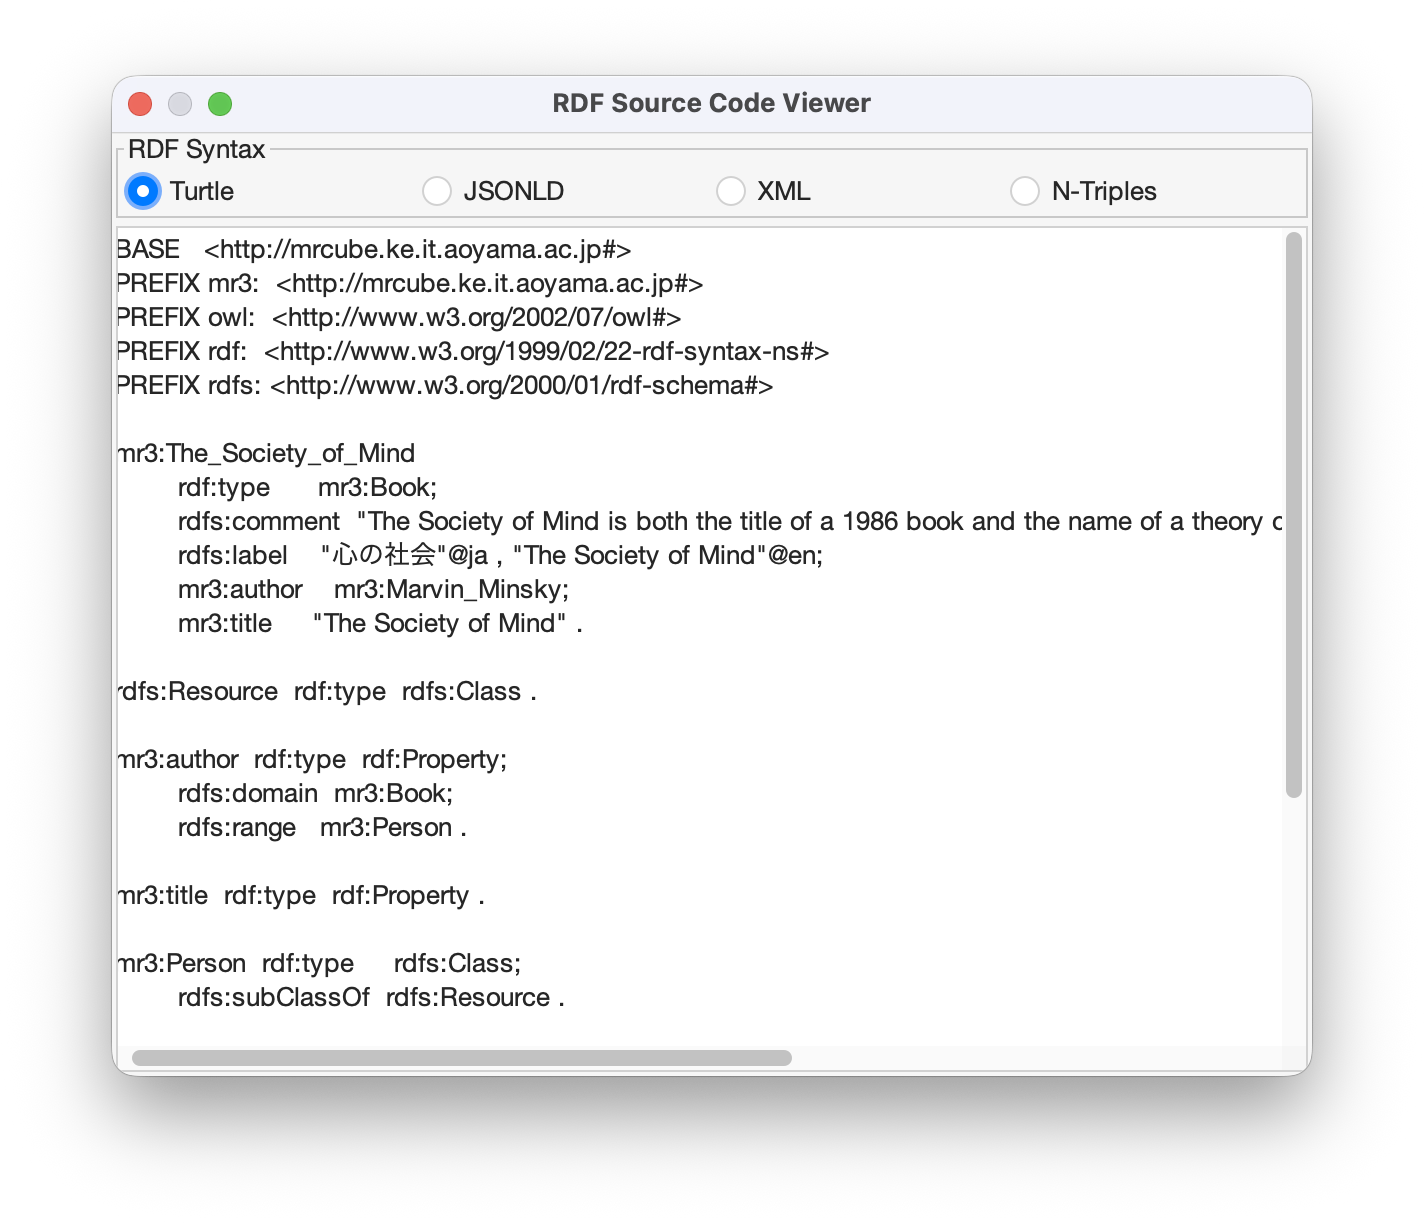
When the users select [RDF Source Code Viewer] sub menu in the [Tool] menu, the dialog as shown in Fig. 48 is shown. The [RDF Source Code Viewer] can output the RDF model constructed by each editor with the specified syntax. The syntax can be selected from Turtle, JSONLD, XML, or N-Triples.
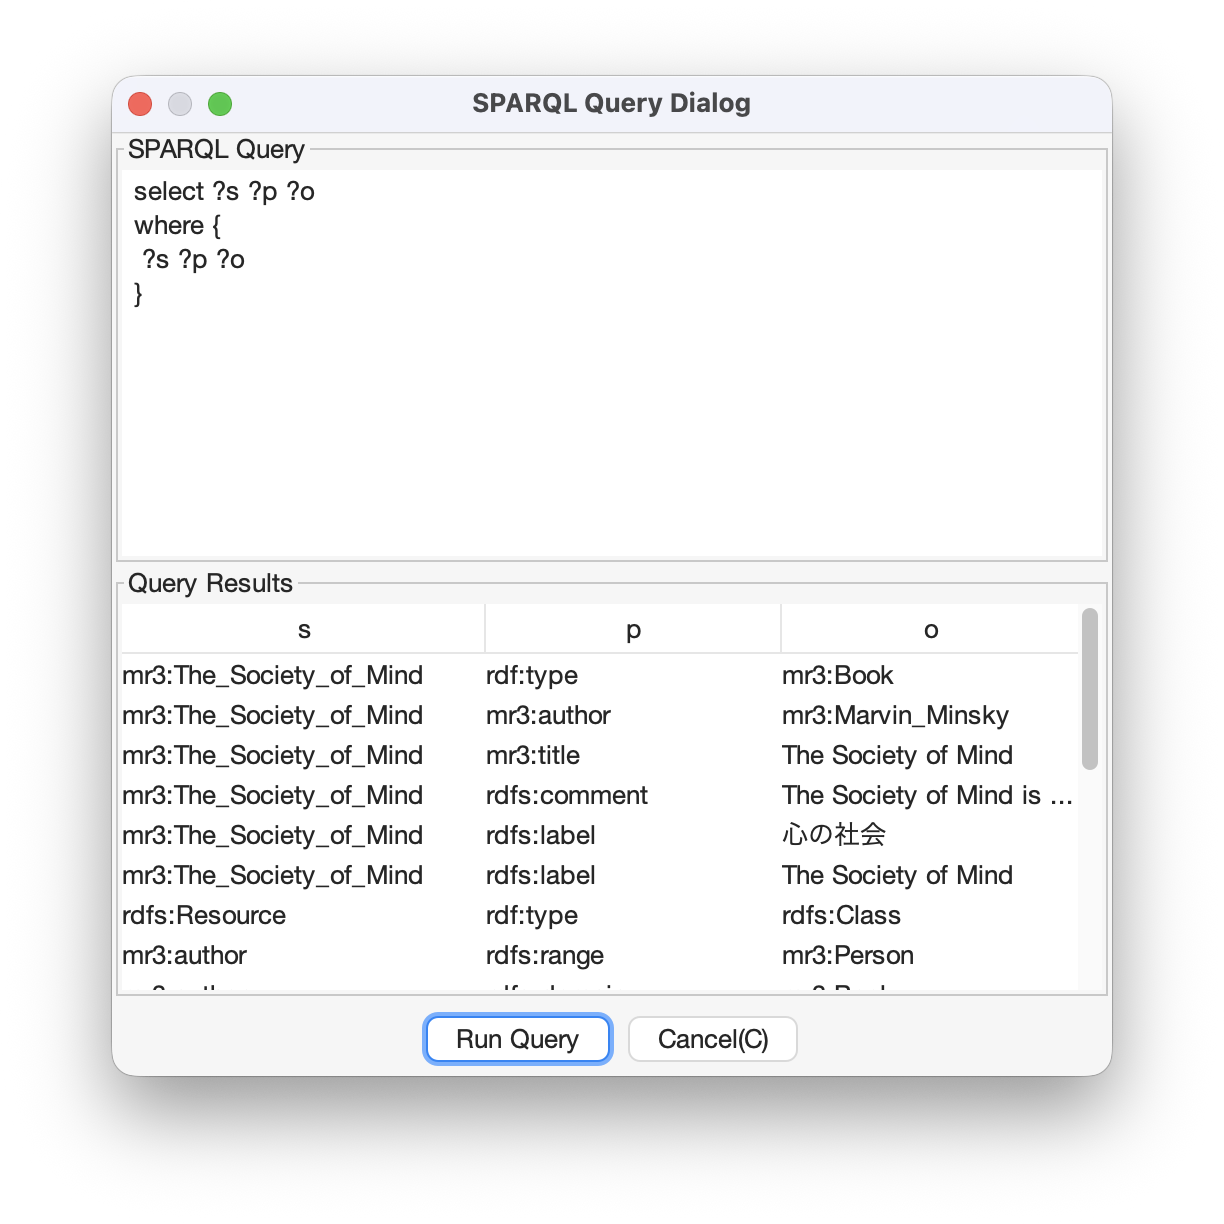
When the users select [SPARQL Query Dialog] sub menu in the [Tool] menu, the dialog as shown in Fig. 49 is shown. In the [SPARQL Query Dialog], enter the SPARQL SELECT query in the [SPARQL Query] text area and press the [Run Query] button to display the search results of the variable specified in [Query Results]. Selecting a resource or literal in the the [Query Results] selects the corresponding resource or literal on each graph.
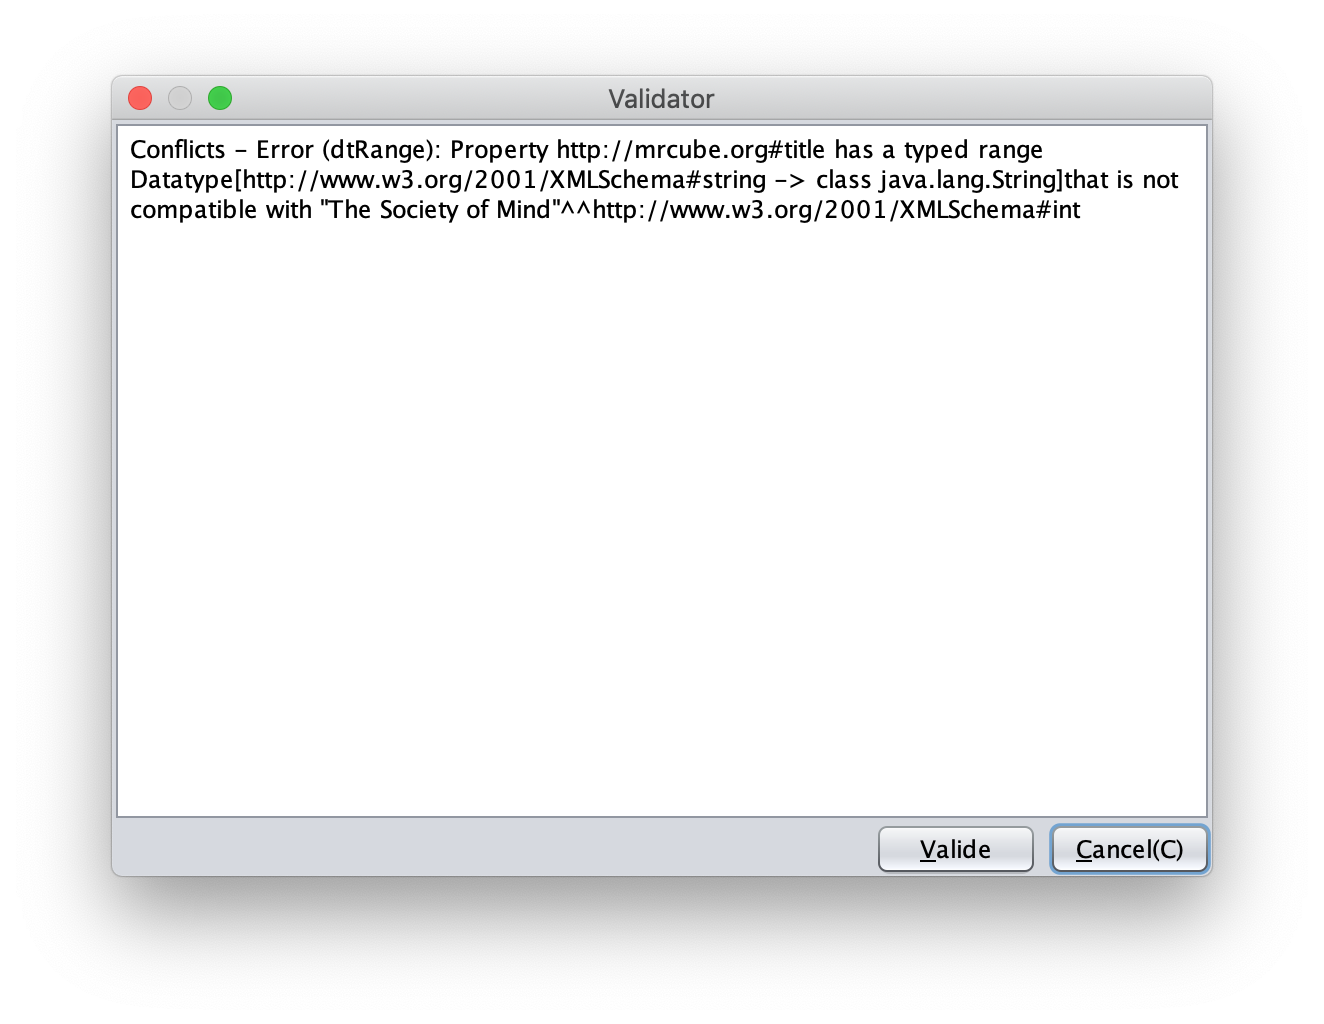
When the users select [Validator] sub menu in the [Tool] menu, the dialog as shown in Fig. 50 is shown. MR3 uses Apache Jena’s validation API (org.apache.jena.reasoner.ValidityReport ) and it is enabled to check if the data type of literals are defined based on a range of property.
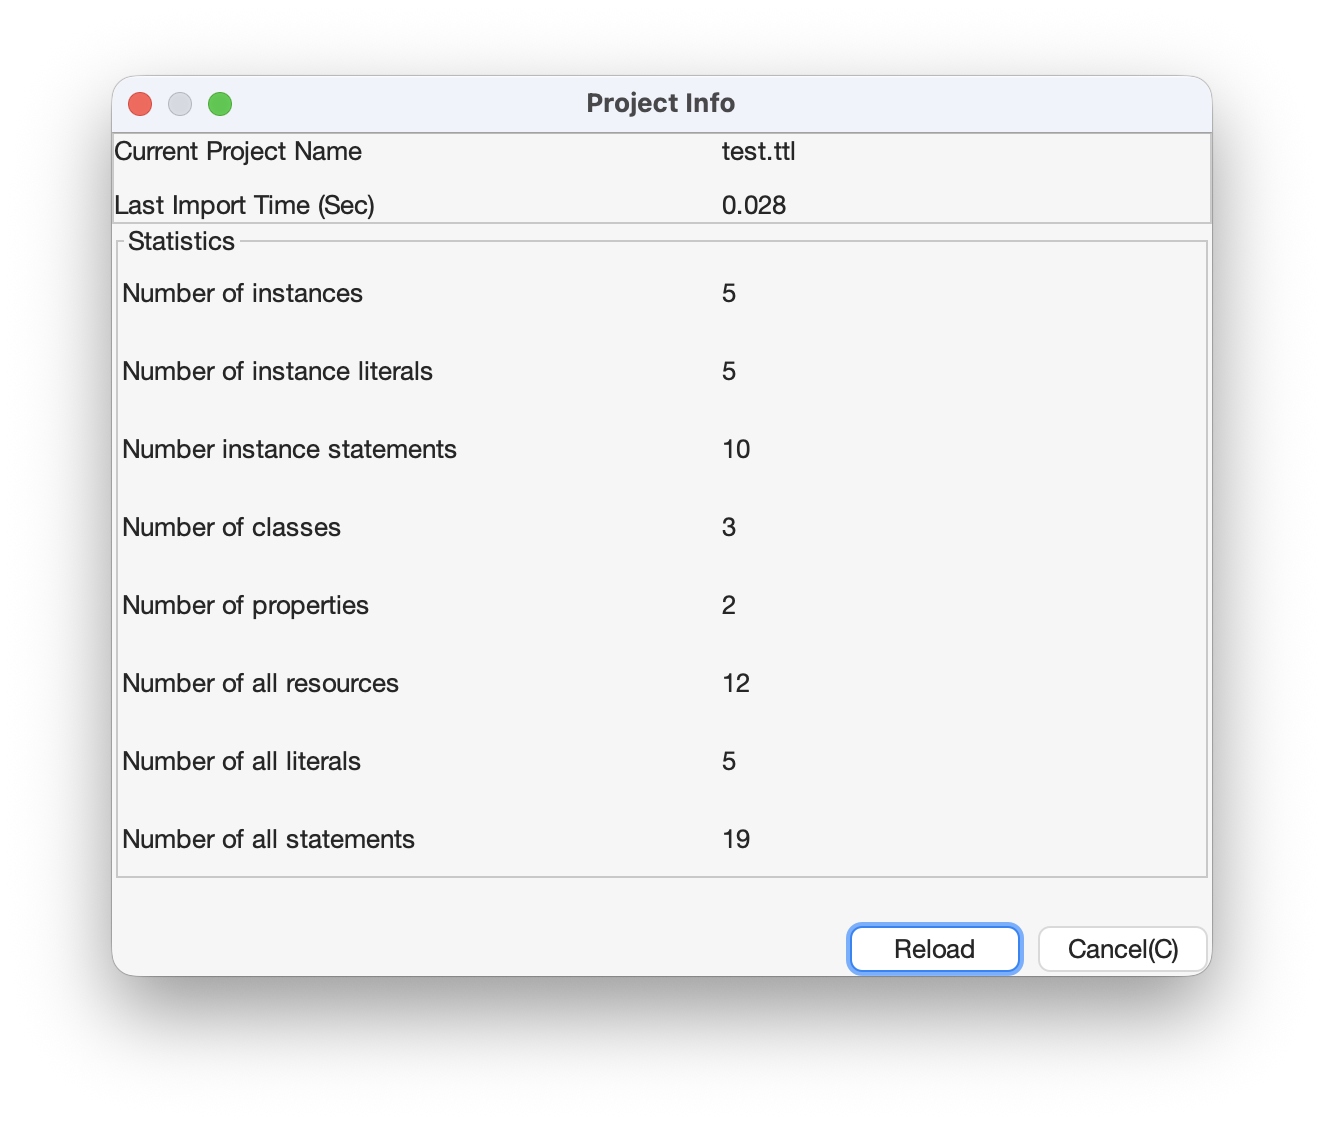
When the users select [Project Info] sub menu in the [Tool] menu, the dialog as shown in Fig. 51 is shown. The current project name, the number of RDF resources, the number of RDF literals, the number of RDF statements, the number of classes, the number of properties, the number of all resources, the number of all literals, the number of all statements are shown in the dialog.
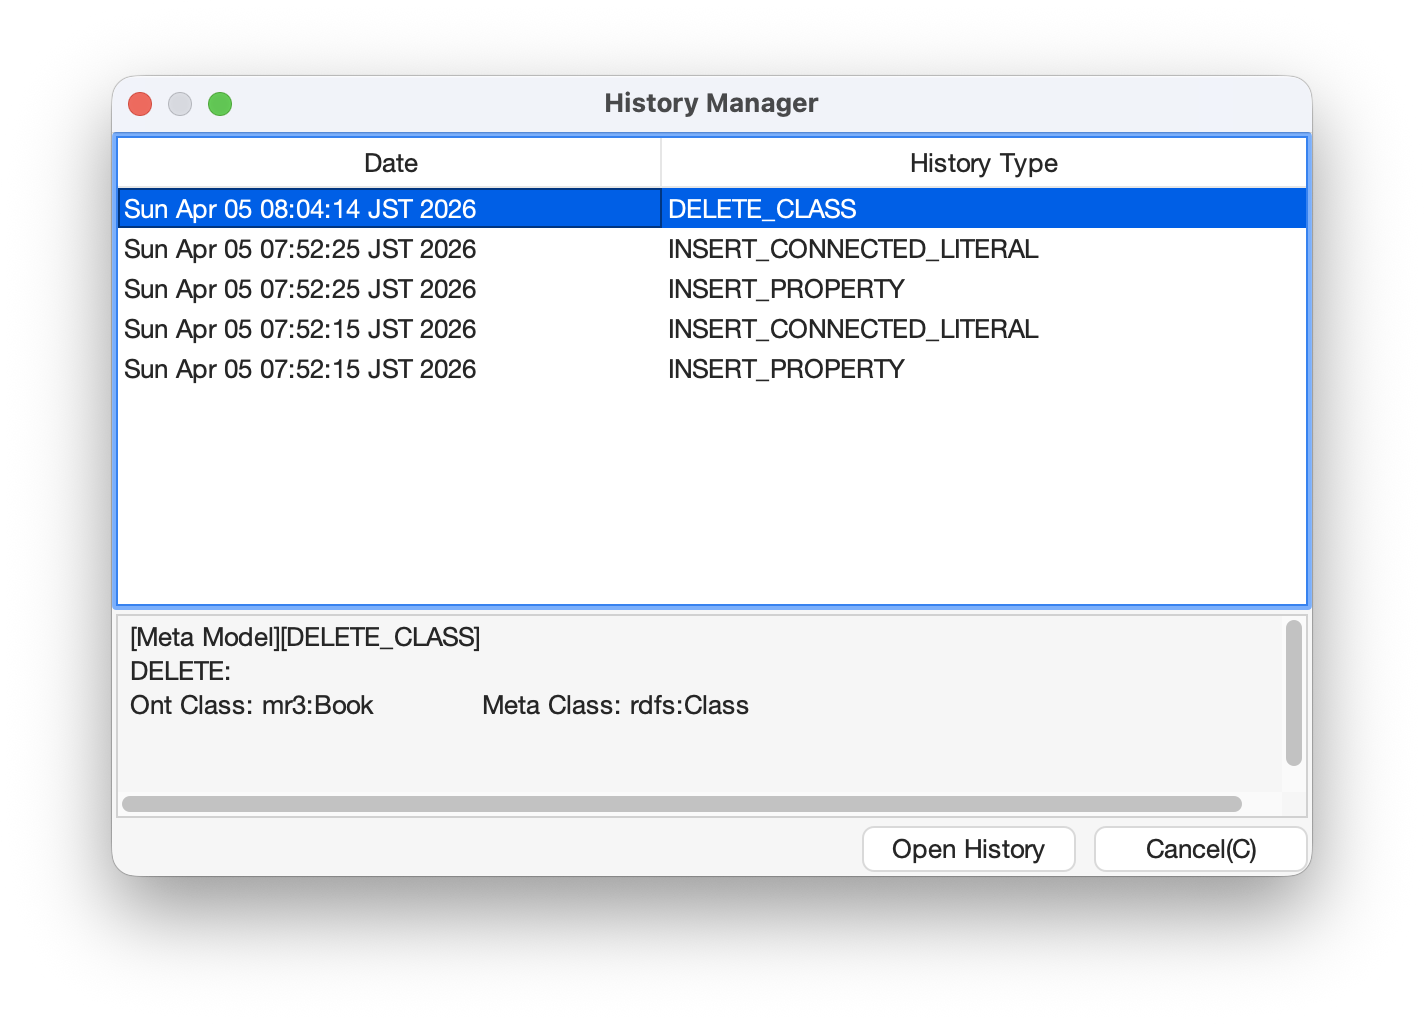
When the users select Show [History Manager] sub menu in the [Tool] menu, the dialog as shown in Fig. 52 is shown. In [History Manager], the operation history performed on each editor is displayed. The users can restore the selected history by selecting one of the history and press the [Open History] button.
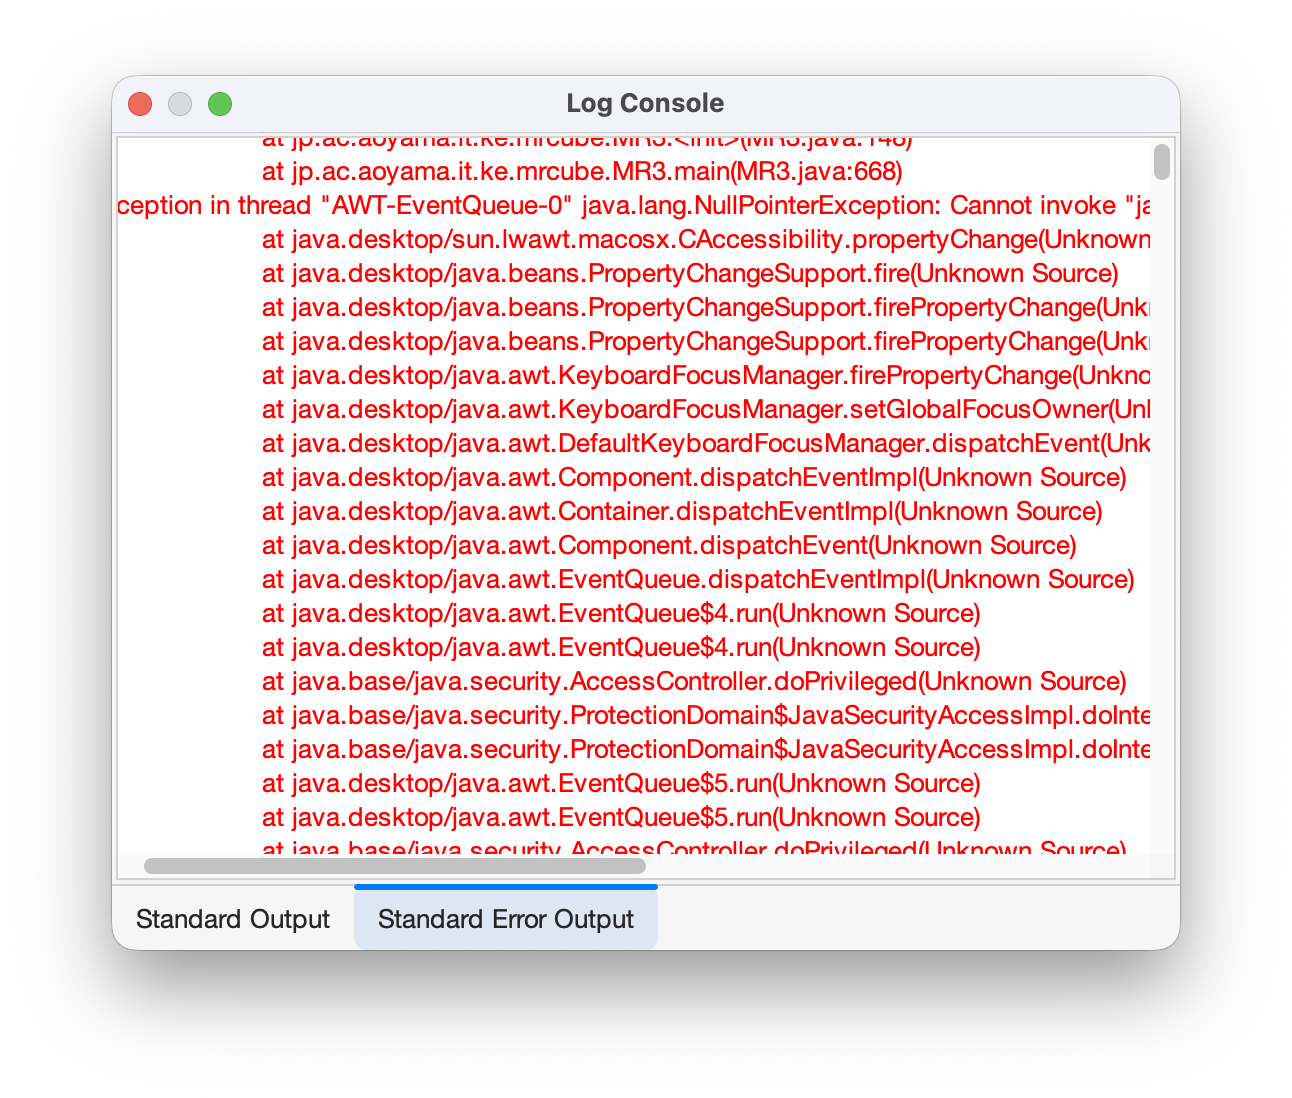
When the users select Show [Log Console] sub menu in the [Tool] menu, the dialog as shown in Fig. 53 is shown. The users can confirm the standard output and the standard error in the dialog.
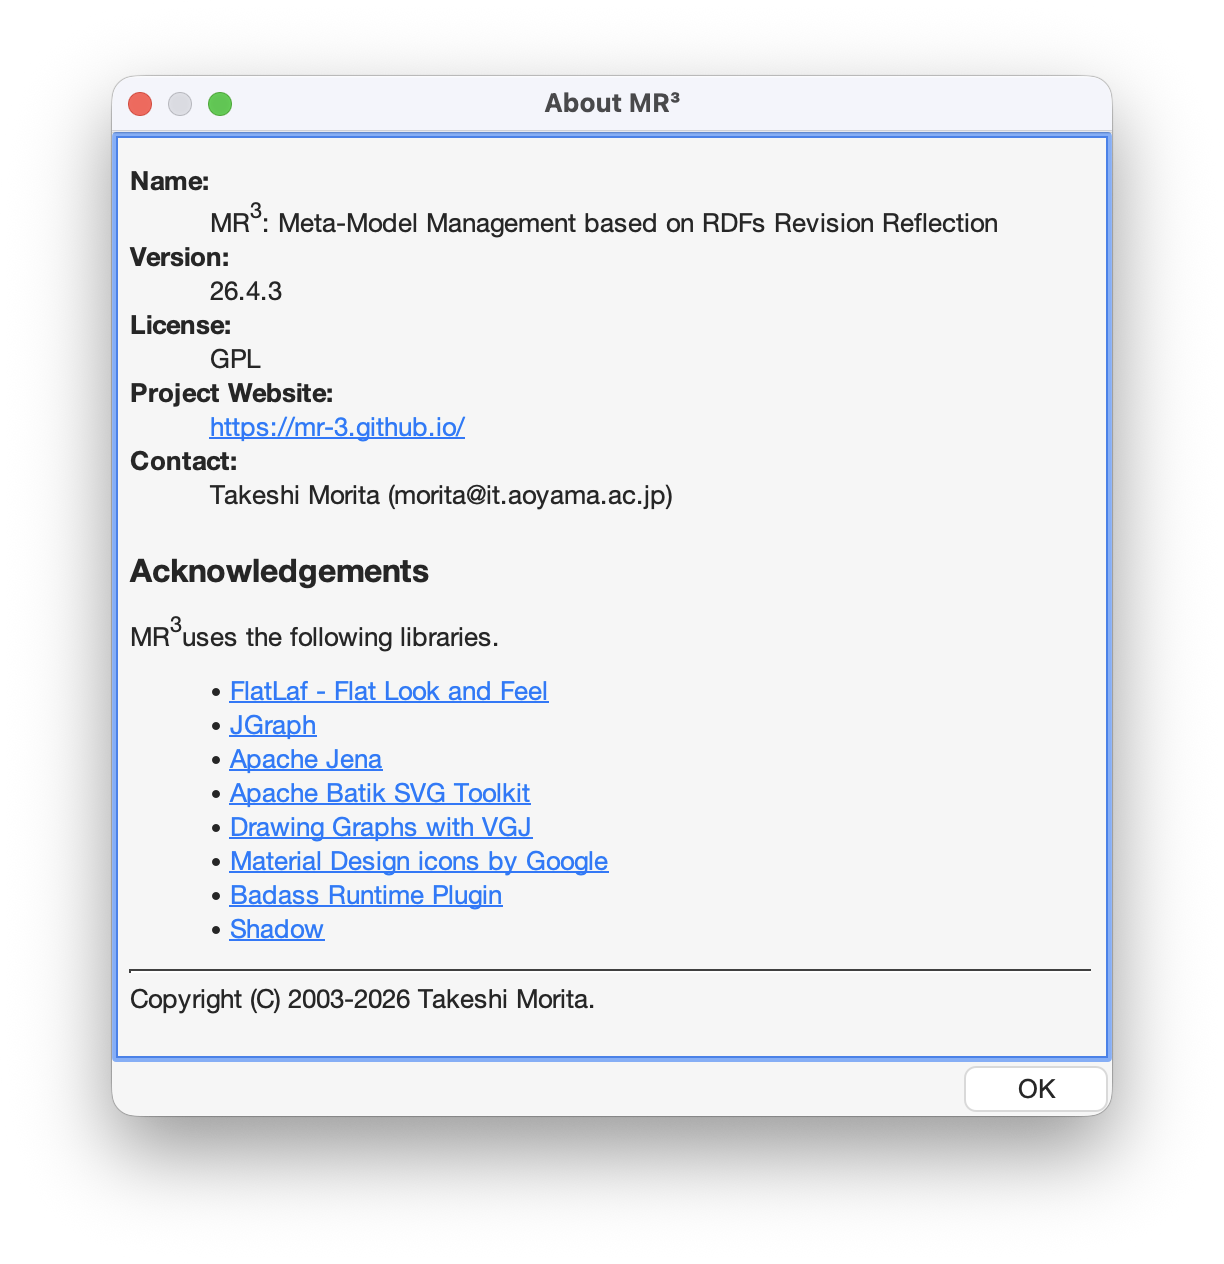
When the users select About [MR3] sub menu in the [Help] menu, the dialog as shown in Fig. 54 is shown. The developer, version, license, project web site, contact, and libraries used in MR3 are shown in the dialog.
URIs of resources are shown in each editor. If namespaces are defined in the Namespace Table, the corresponding prefixes are replaced with the namespaces.
ID
IDs of resources are shown in each editor.
Label
Values of rdfs:label properties are shown in each editor. If a resource does not have rdfs:label property, the URI of the resource is shown instead of the value of rdfs:label property.
Resource Type
If the users check the Show Resource Type, the type of RDF resources are shown at the top right of each resource.
RDF Property Label
If the users check the Show RDF Property Label, the label of properties are shown. If it is not checked, the label properties are not shown in the Instance Editor.
ToolTips
If the users check the Show ToolTips, tooltips are shown when the users mouse over the resources.
RDF Graph Layout (Left to Right)
Automatically layout the RDF graph (left to right)
Class Graph Layout (Left to Right)
Automatically layout the Class graph (left to right)
Class Graph Layout (Up to Down)
Automatically layout the Class graph (up to down)
Property Graph Layout (Left to Right)
Automatically layout the Property graph (left to right)
Property Graph Layout (Up to Down)
Automatically layout the Property graph (up to down)
The overview of the Instance Editor is shown in the dialog. When the users drag a red rectangle, part of the RDF graph in the red rectangle are shown in the Instance Editor. The users can change the size of the red rectangle by dragging the right down part. It is enabled to expand and reduce the editor.
Class Editor Overview
The overview of the Class editor is shown in the dialog. The functions of the dialog is as same as Instance Editor Overview.
Property Editor Overview
The overview of the Property editor is shown in the dialog. The functions of the dialog is as same as Instance Editor Overview.
Attribute Dialog
Show Attribute Dialog to the front.
Namespace Table
Show Namespace Table to the front.
Deploy Windows (C,P,R)
Show the Instance Editor, the Property editor, and the Class editor.


 icon in the Toolbar.
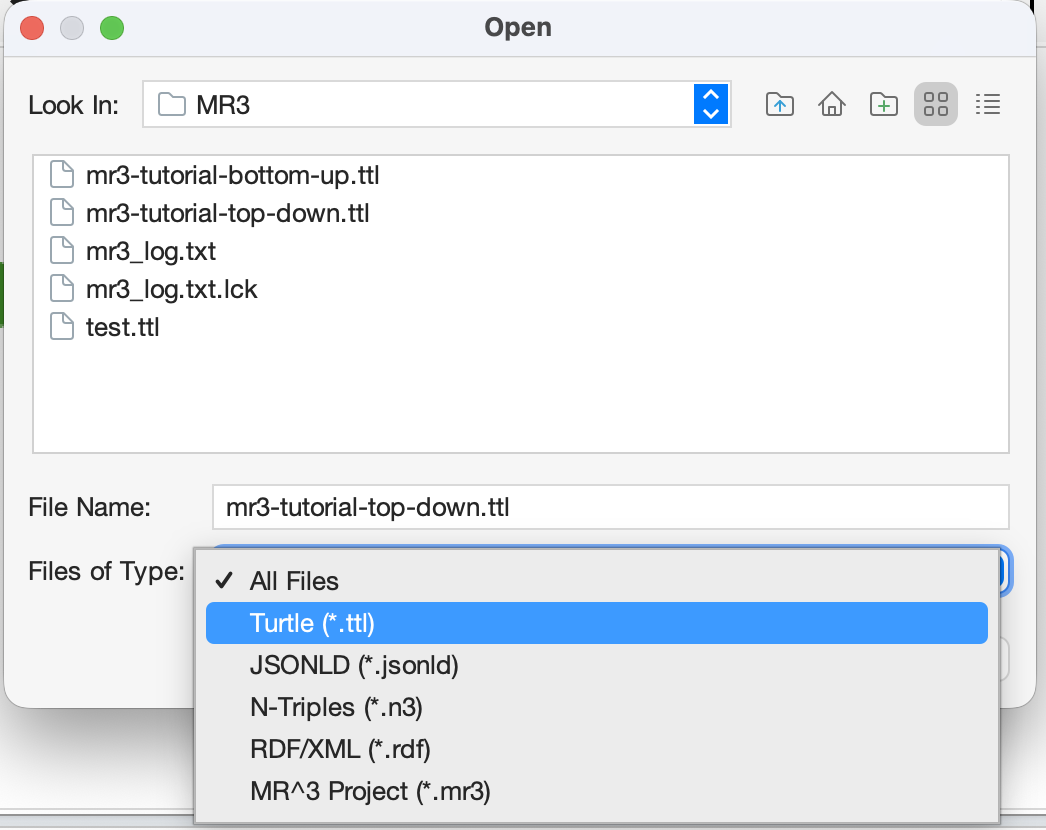
 icon in the Toolbar.